User Manual
Install
The app is available on the Apple App Store:

The Menu Bar

Using the tab menu at the bottom of the screen, you can navigate between the following screens:
- Eat: Here, a new meal consisting of one or more dishes can be created. The nutritional values are then calculated and can be exported to Loop.
- Cook & Bake: This is where you can create and manage your own recipes.
- Dishes: This is where the dishes used to create meals are managed.
- Ingredients: This is where the ingredients used in recipes are managed.
- Settings: Here, various therapy and app settings can be configured.
Screen: Eat
Creating a Meal
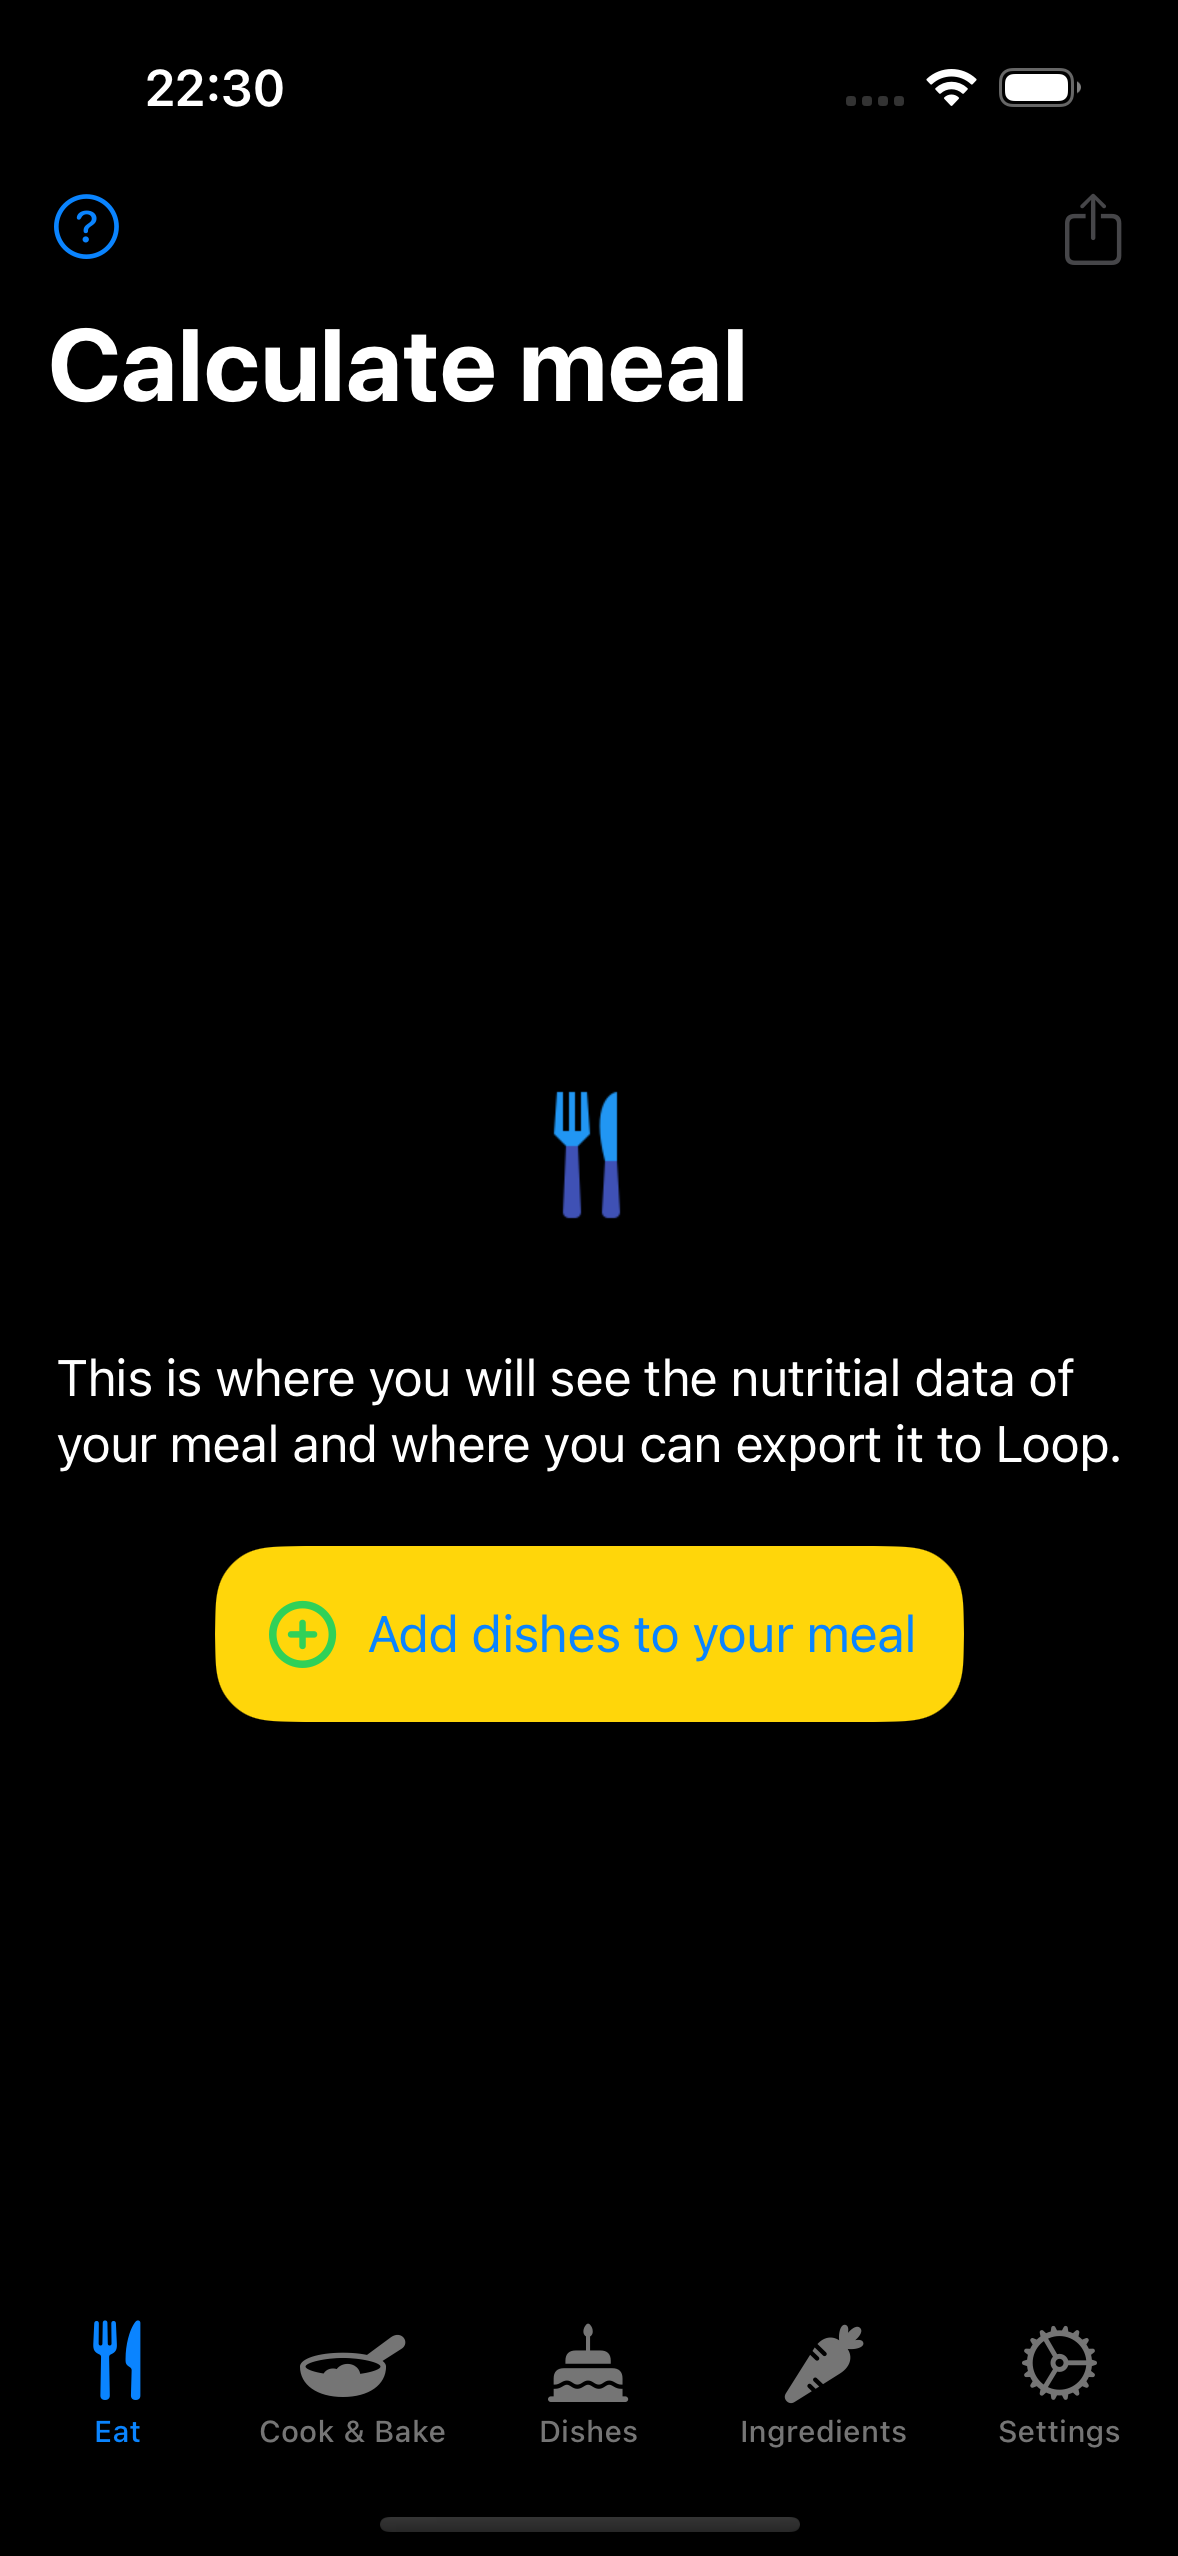
On this screen, which appears when the app is opened, a new meal is created. The nutritional values are then calculated and can be exported to Loop. A meal consists of one or more dishes, which must be created beforehand.
To create a meal, tap the yellow button labeled "Add dishes to your meal."
Select Dishes
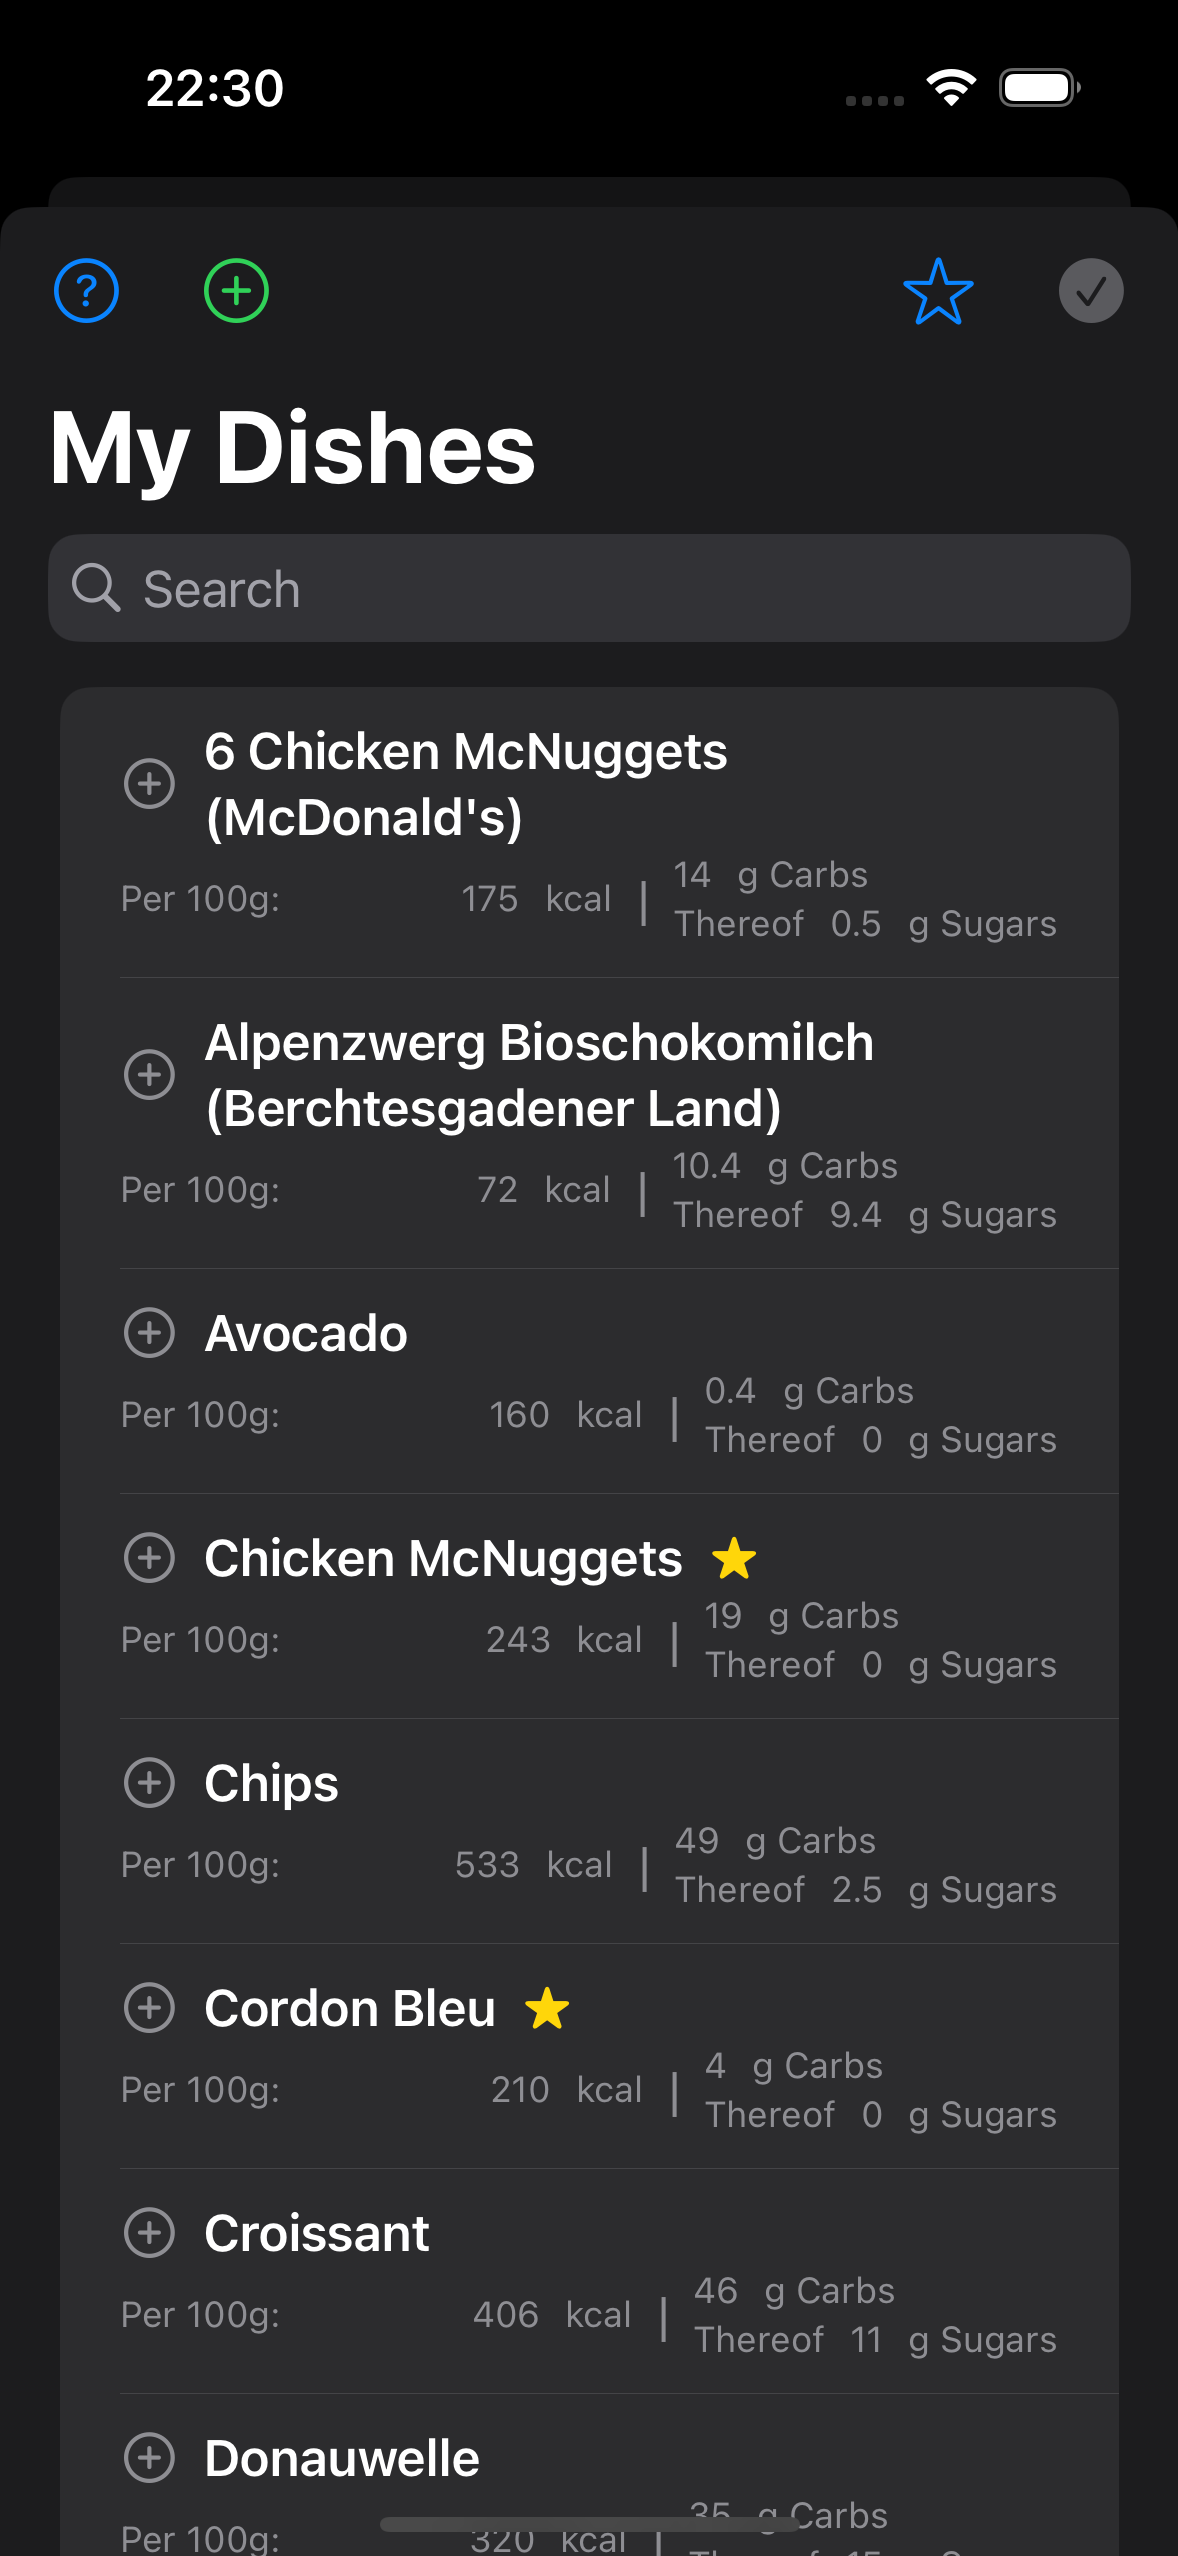
The list of created dishes appears. By clicking the small star above the list of dishes, only the dishes marked as favorites will be displayed. Additionally, you can use the search field to look for dishes (searching within the names).
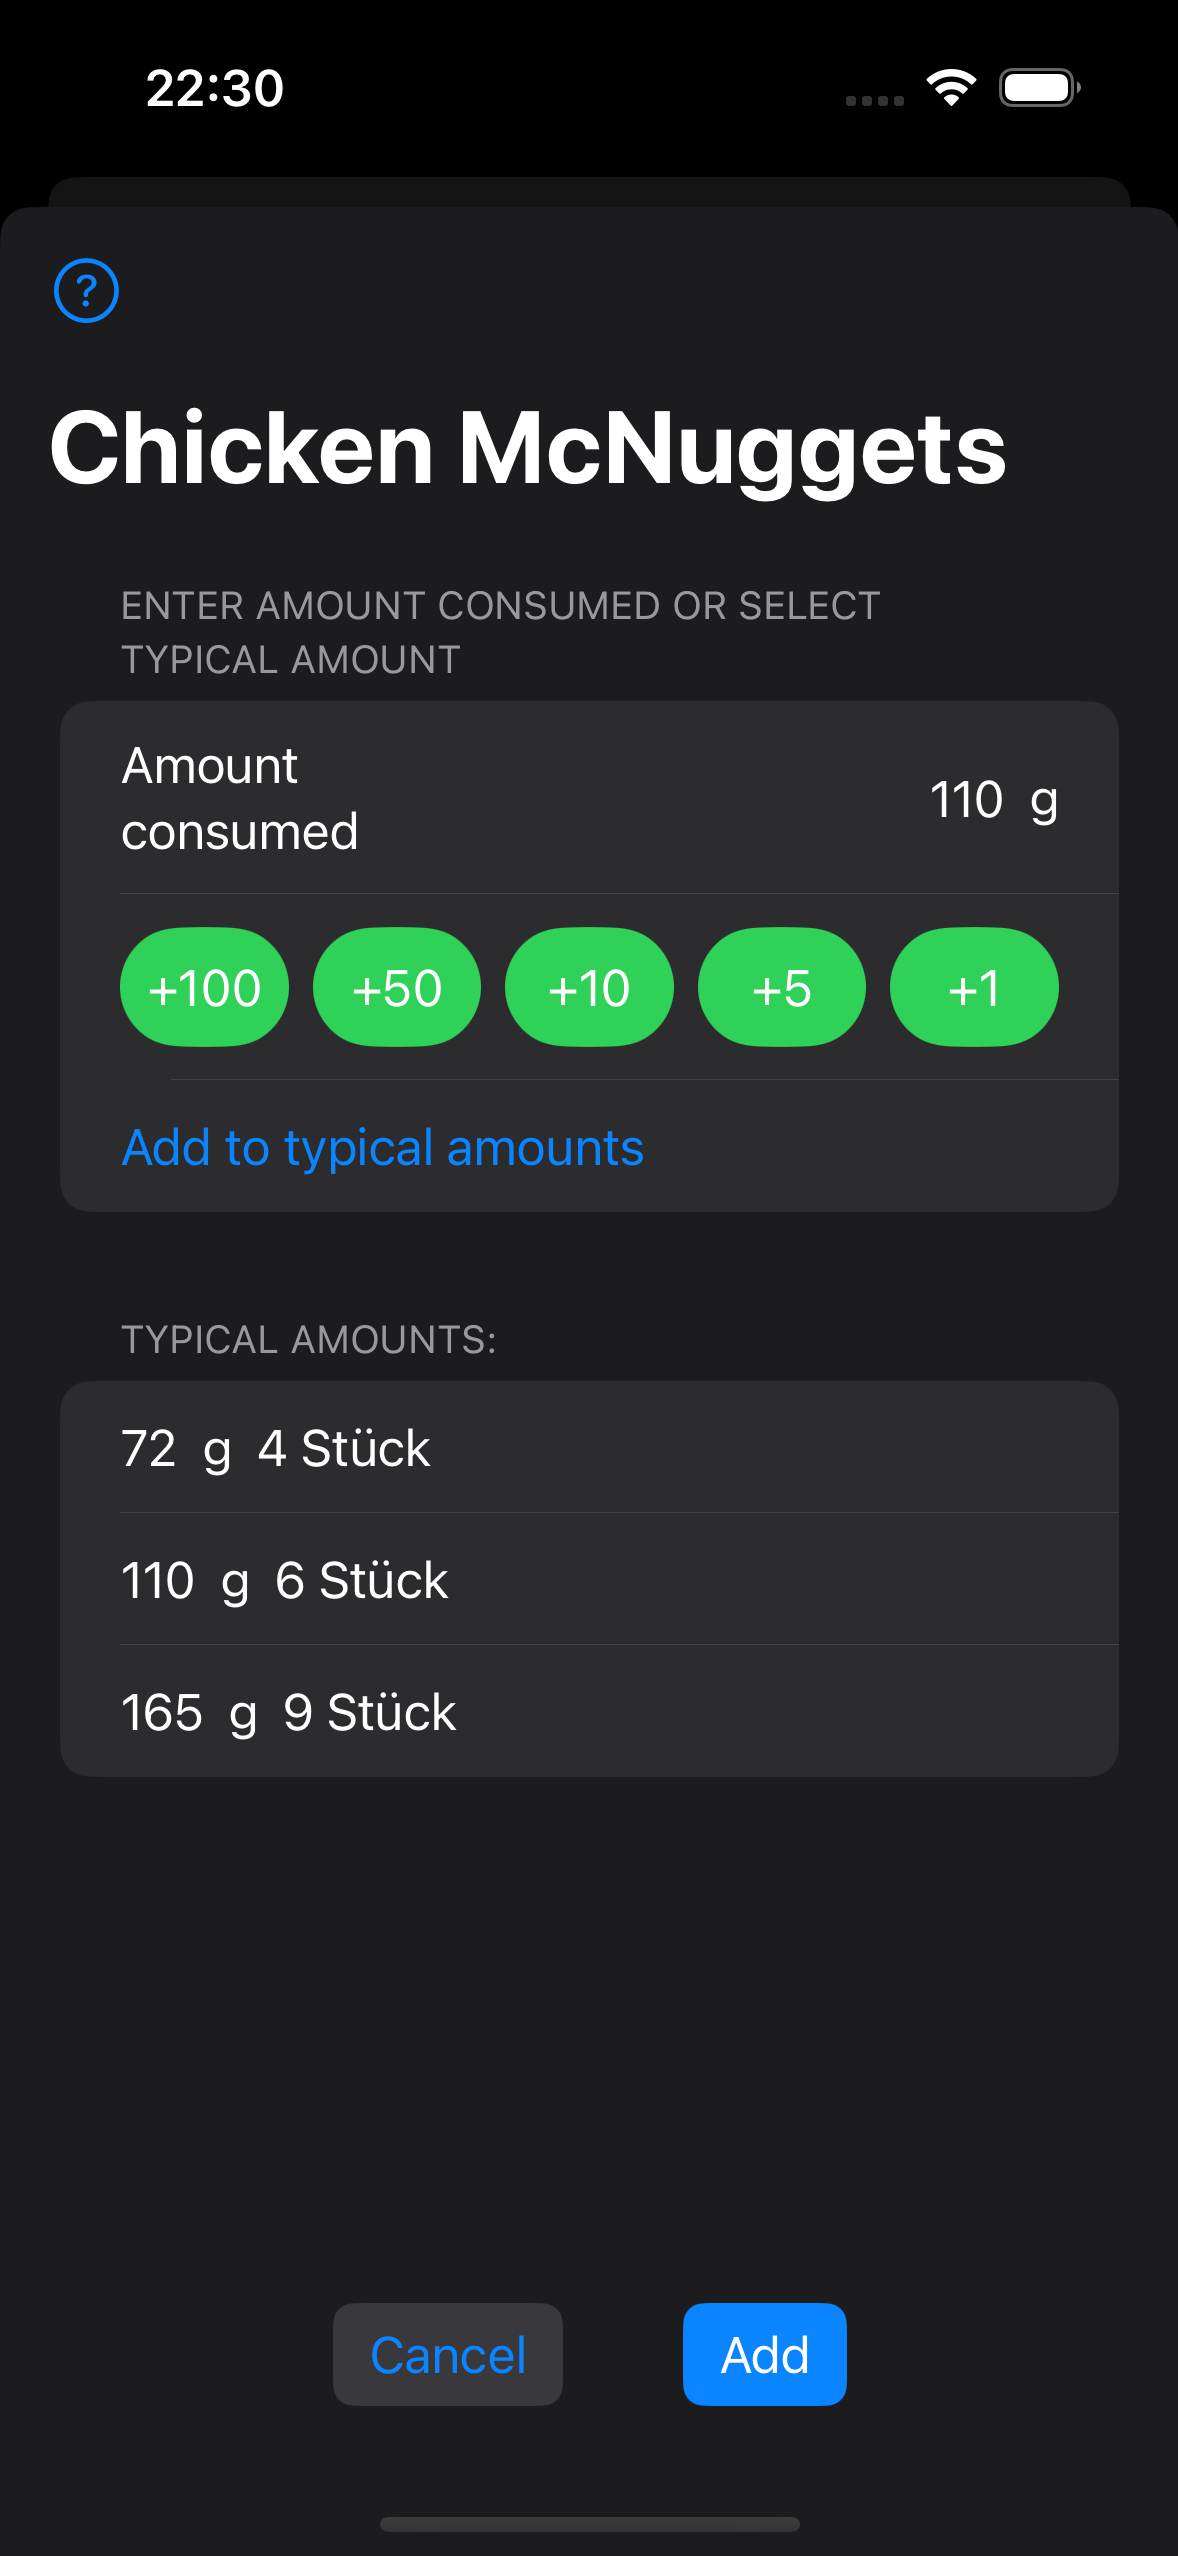
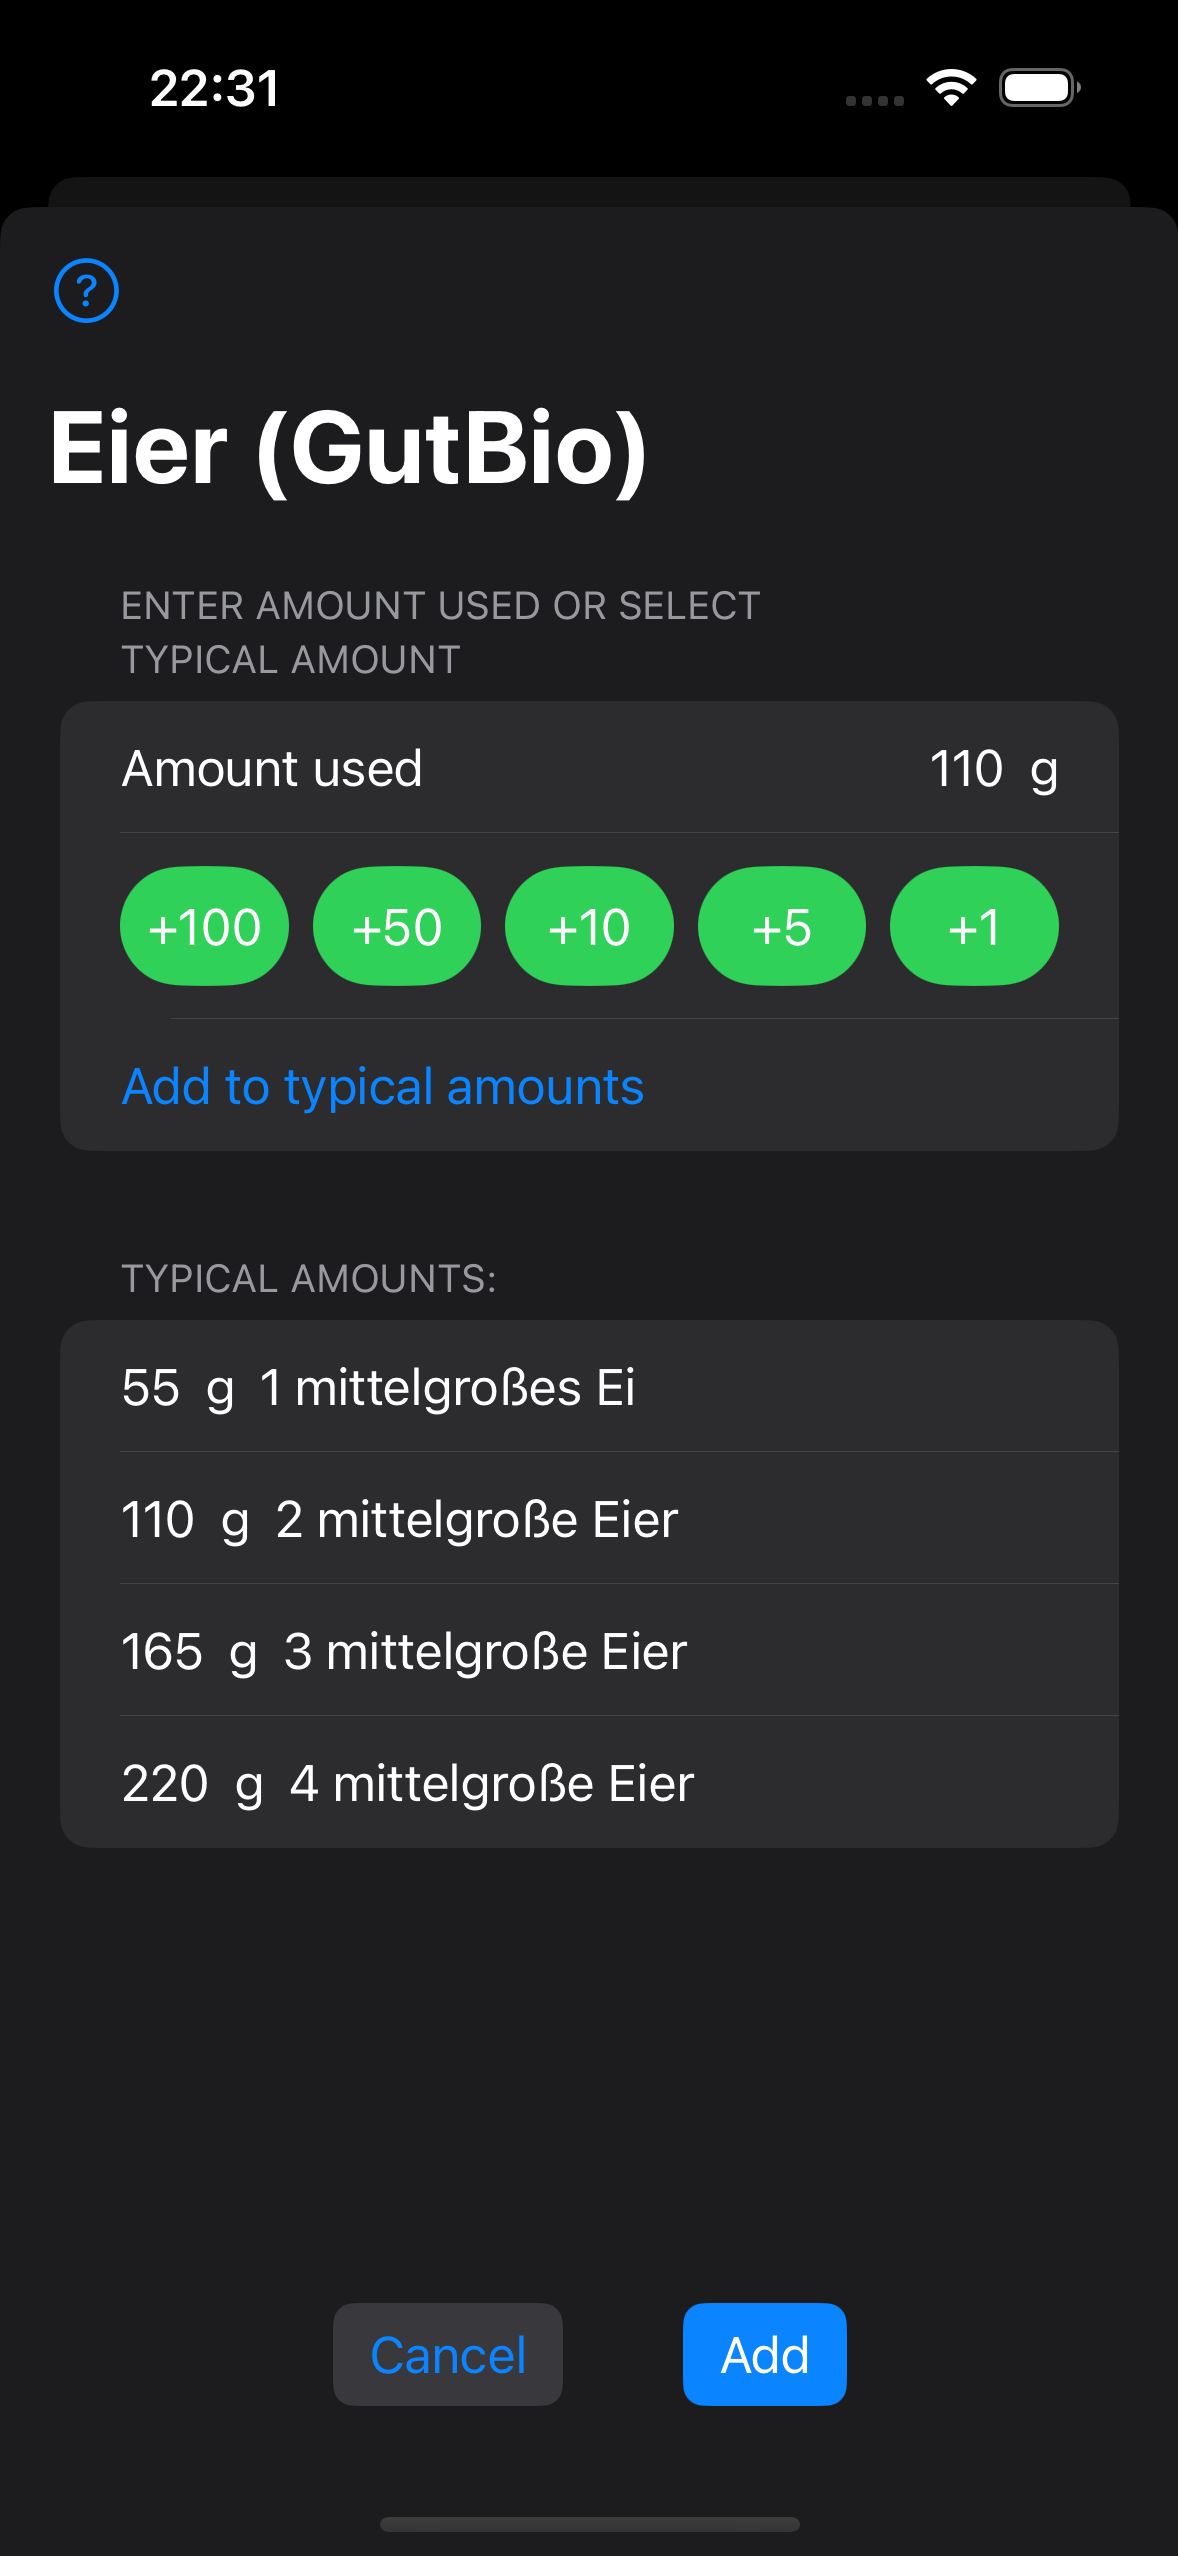
To add a dish to the meal, tap on it once. This opens a window to input the consumed amount. If typical amounts were defined when the dish was created, you can select one of those or enter a custom amount. Alternatively, green buttons are available to add their displayed value to the already entered quantity. The amount entered here should correspond to the actual consumed quantity of the dish in grams.
You also have the option to save the currently entered amount as a new typical amount. To do so, tap "Add to typical amounts," enter a comment, and confirm with the green plus symbol. Managing or modifying typical amounts is done in the dialog for editing dishes.
This process can be optionally repeated for additional dishes in the meal.
The Meal Summary
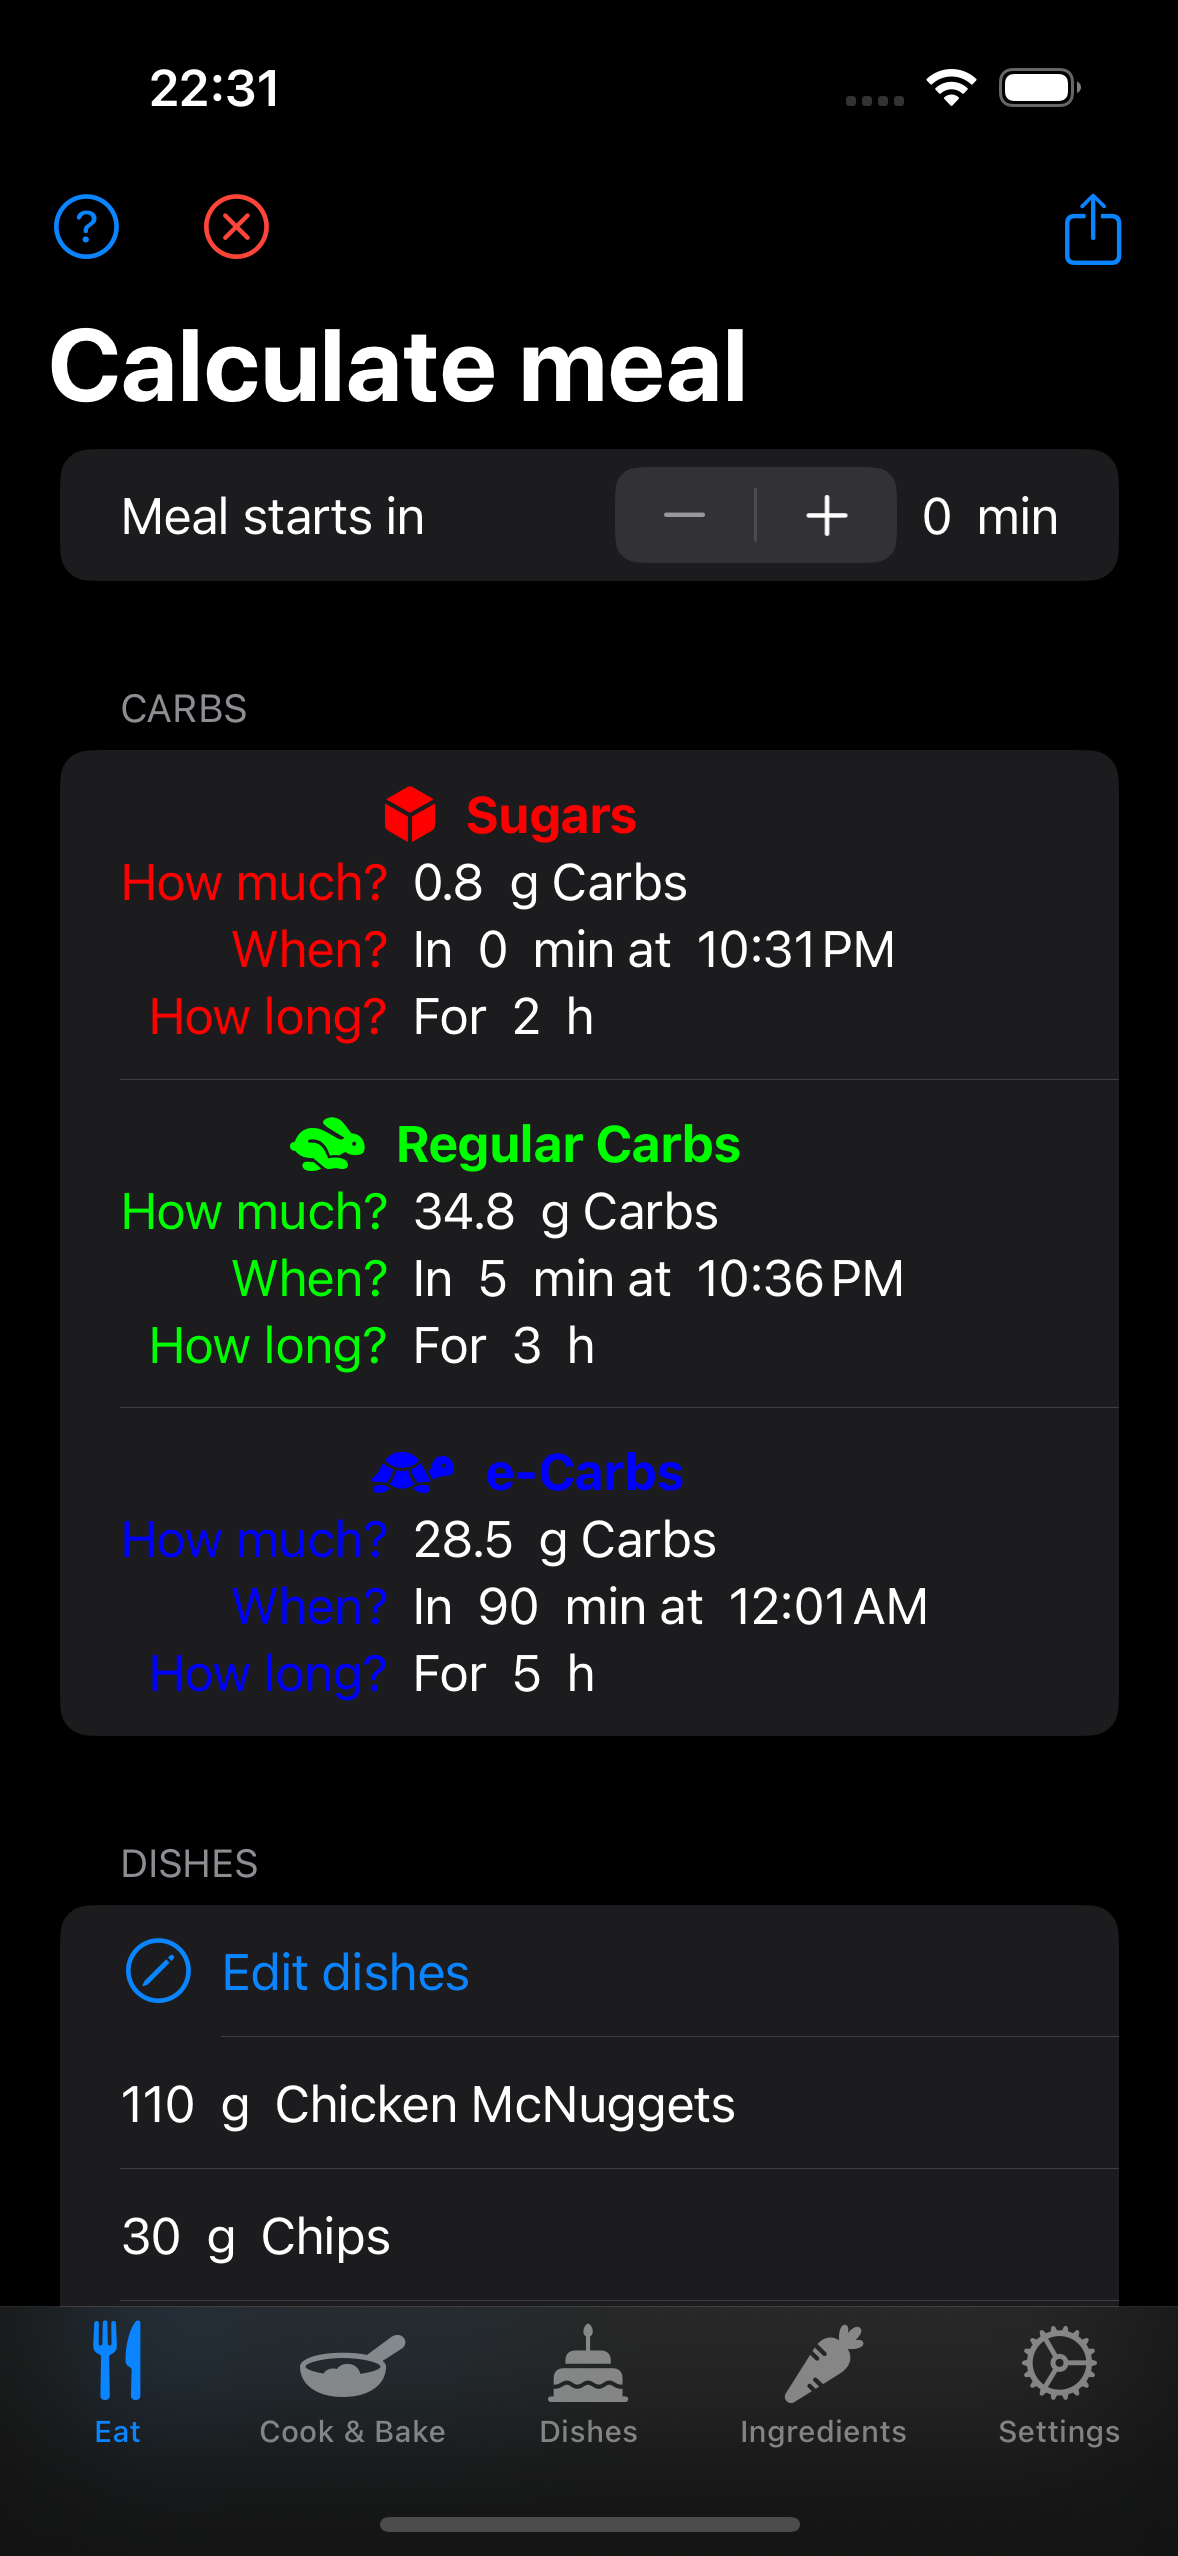
Once at least one dish has been selected, a summary of the meal's nutritional values appears, including the three types of carbohydrates - sugar, regular, and extended carbohydrates:
- Red sugar cube icon: Carbohydrates from sugar are typically absorbed the fastest. The corresponding parameters can be adjusted in the therapy settings.
- Green rabbit icon: Regular carbohydrates are absorbed more slowly than sugar. These parameters can also be adjusted in the therapy settings.
- Blue turtle icon: Extended carbohydrates (also known as e-Carbs or Fake Carbs) do not come from carbohydrates but from fats and proteins. Therefore, they are absorbed much later and over a longer period.
At this point, the insulin-to-food ratio can also be adjusted.
Through the "Edit dishes" link, additional dishes can be added or existing ones removed.
Tapping the red cross at the top of the screen will reset the meal, meaning all food components and the insulin-to-food ratio will be set to zero.
The Meal Details
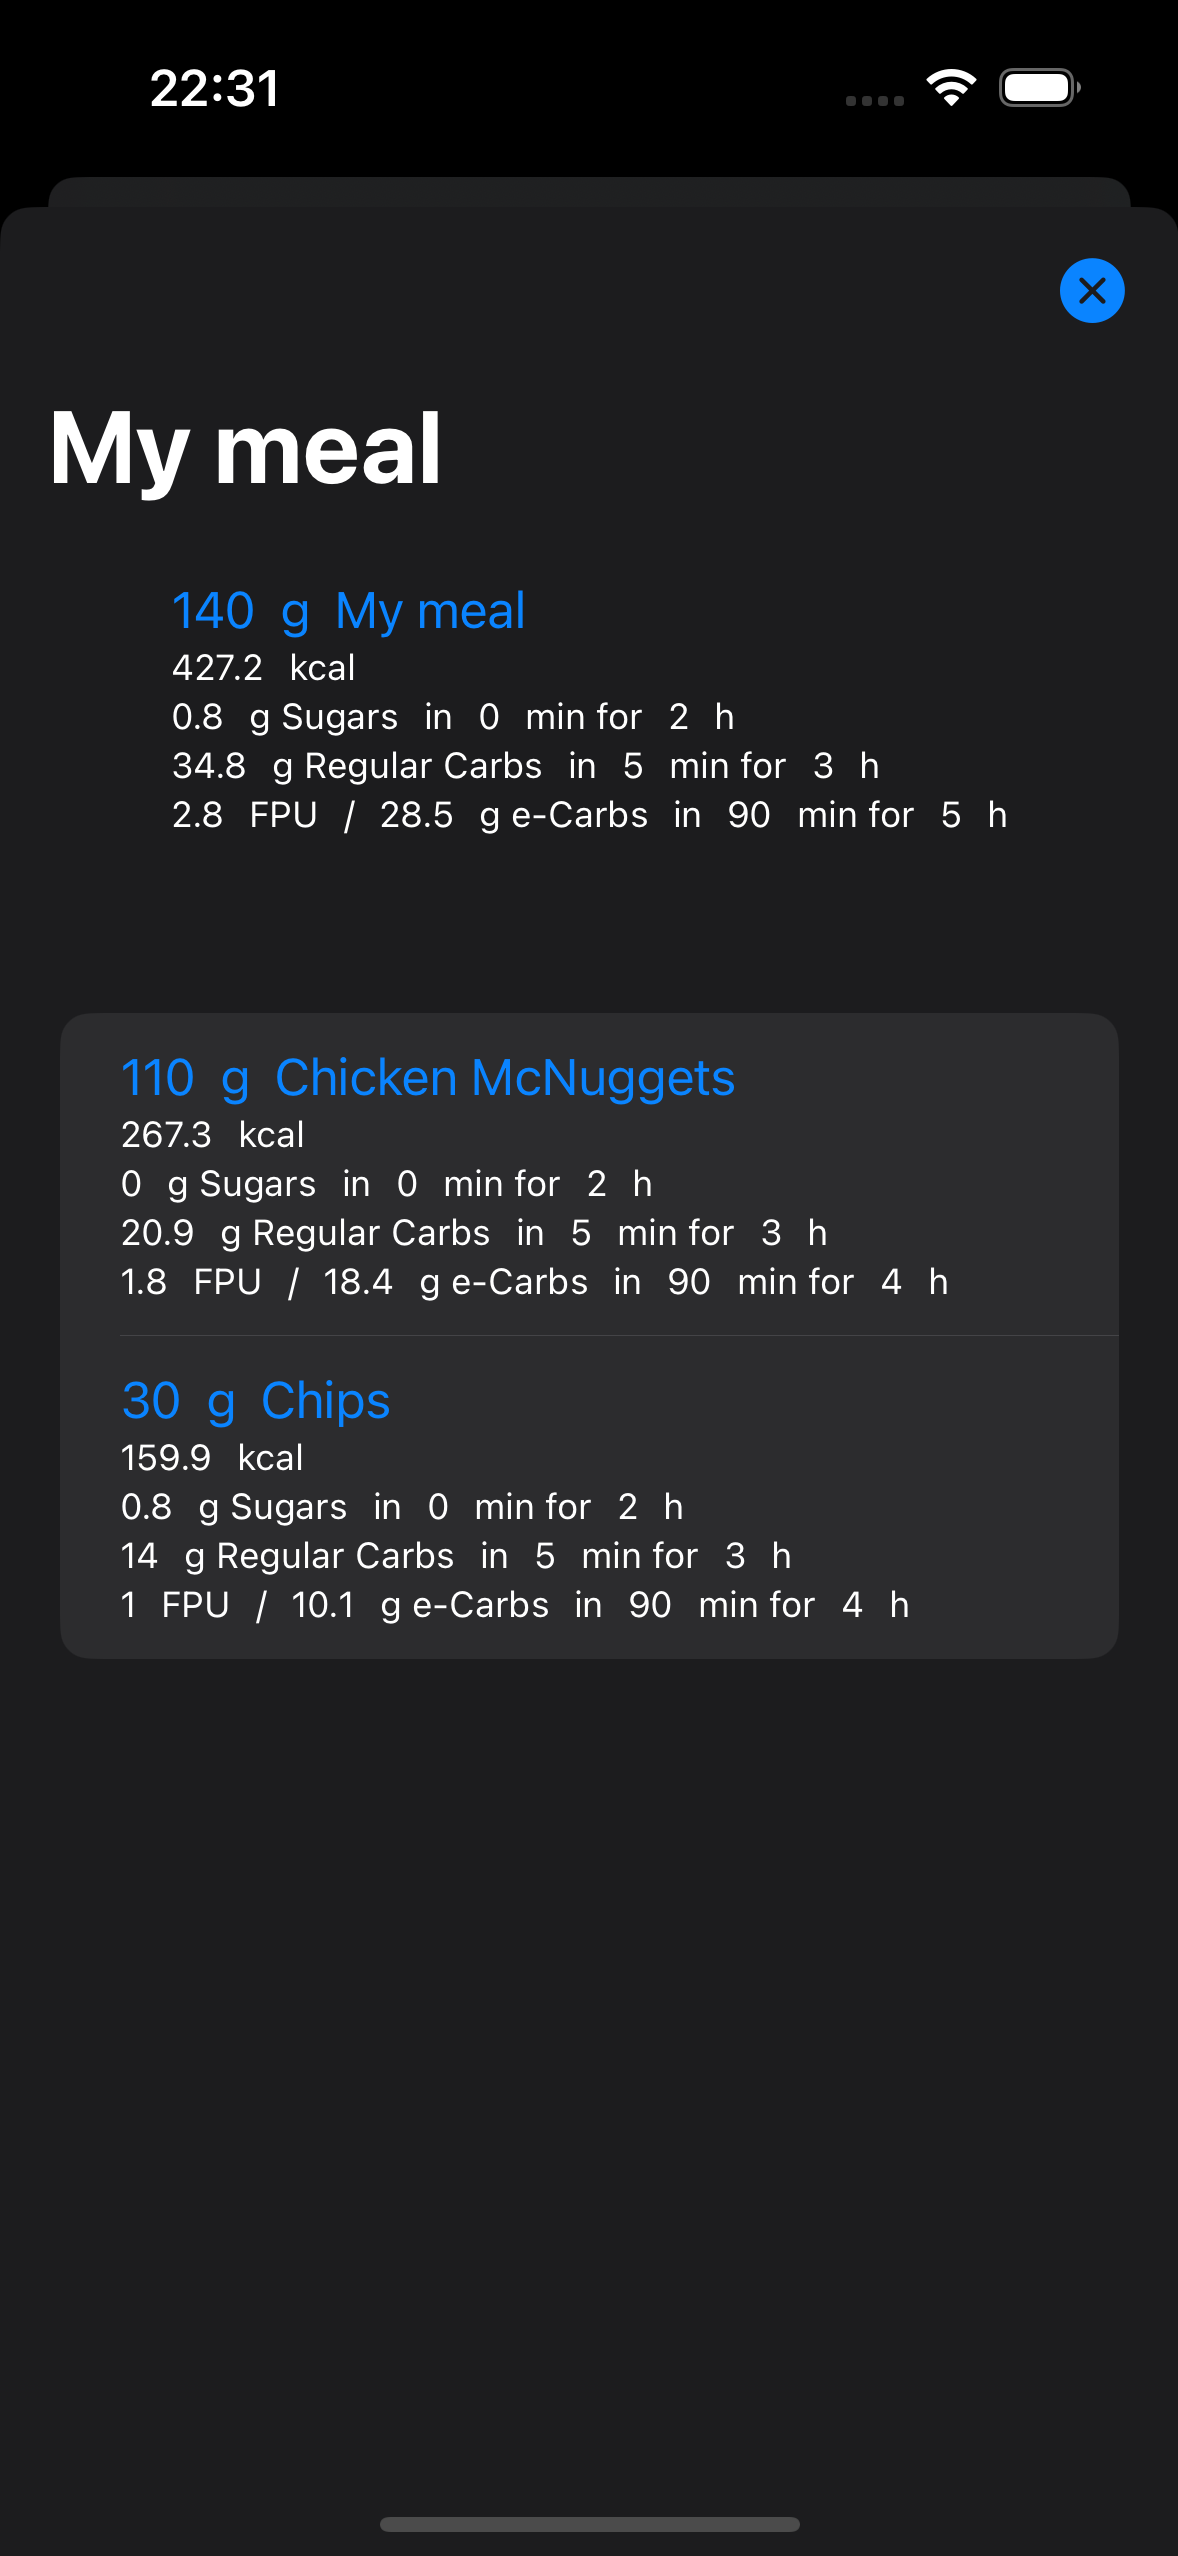
Tapping the info icon opens the view with the details of the meal.
Export to Apple Health
EasyFPU can export rapid and regular carbohydrates, "extended" carbohydrates calculated from fat-protein units, and calories to Apple Health. This is useful when the data is to be used by other apps (e.g., nutrition apps), especially Loop, an app for controlling insulin pumps.
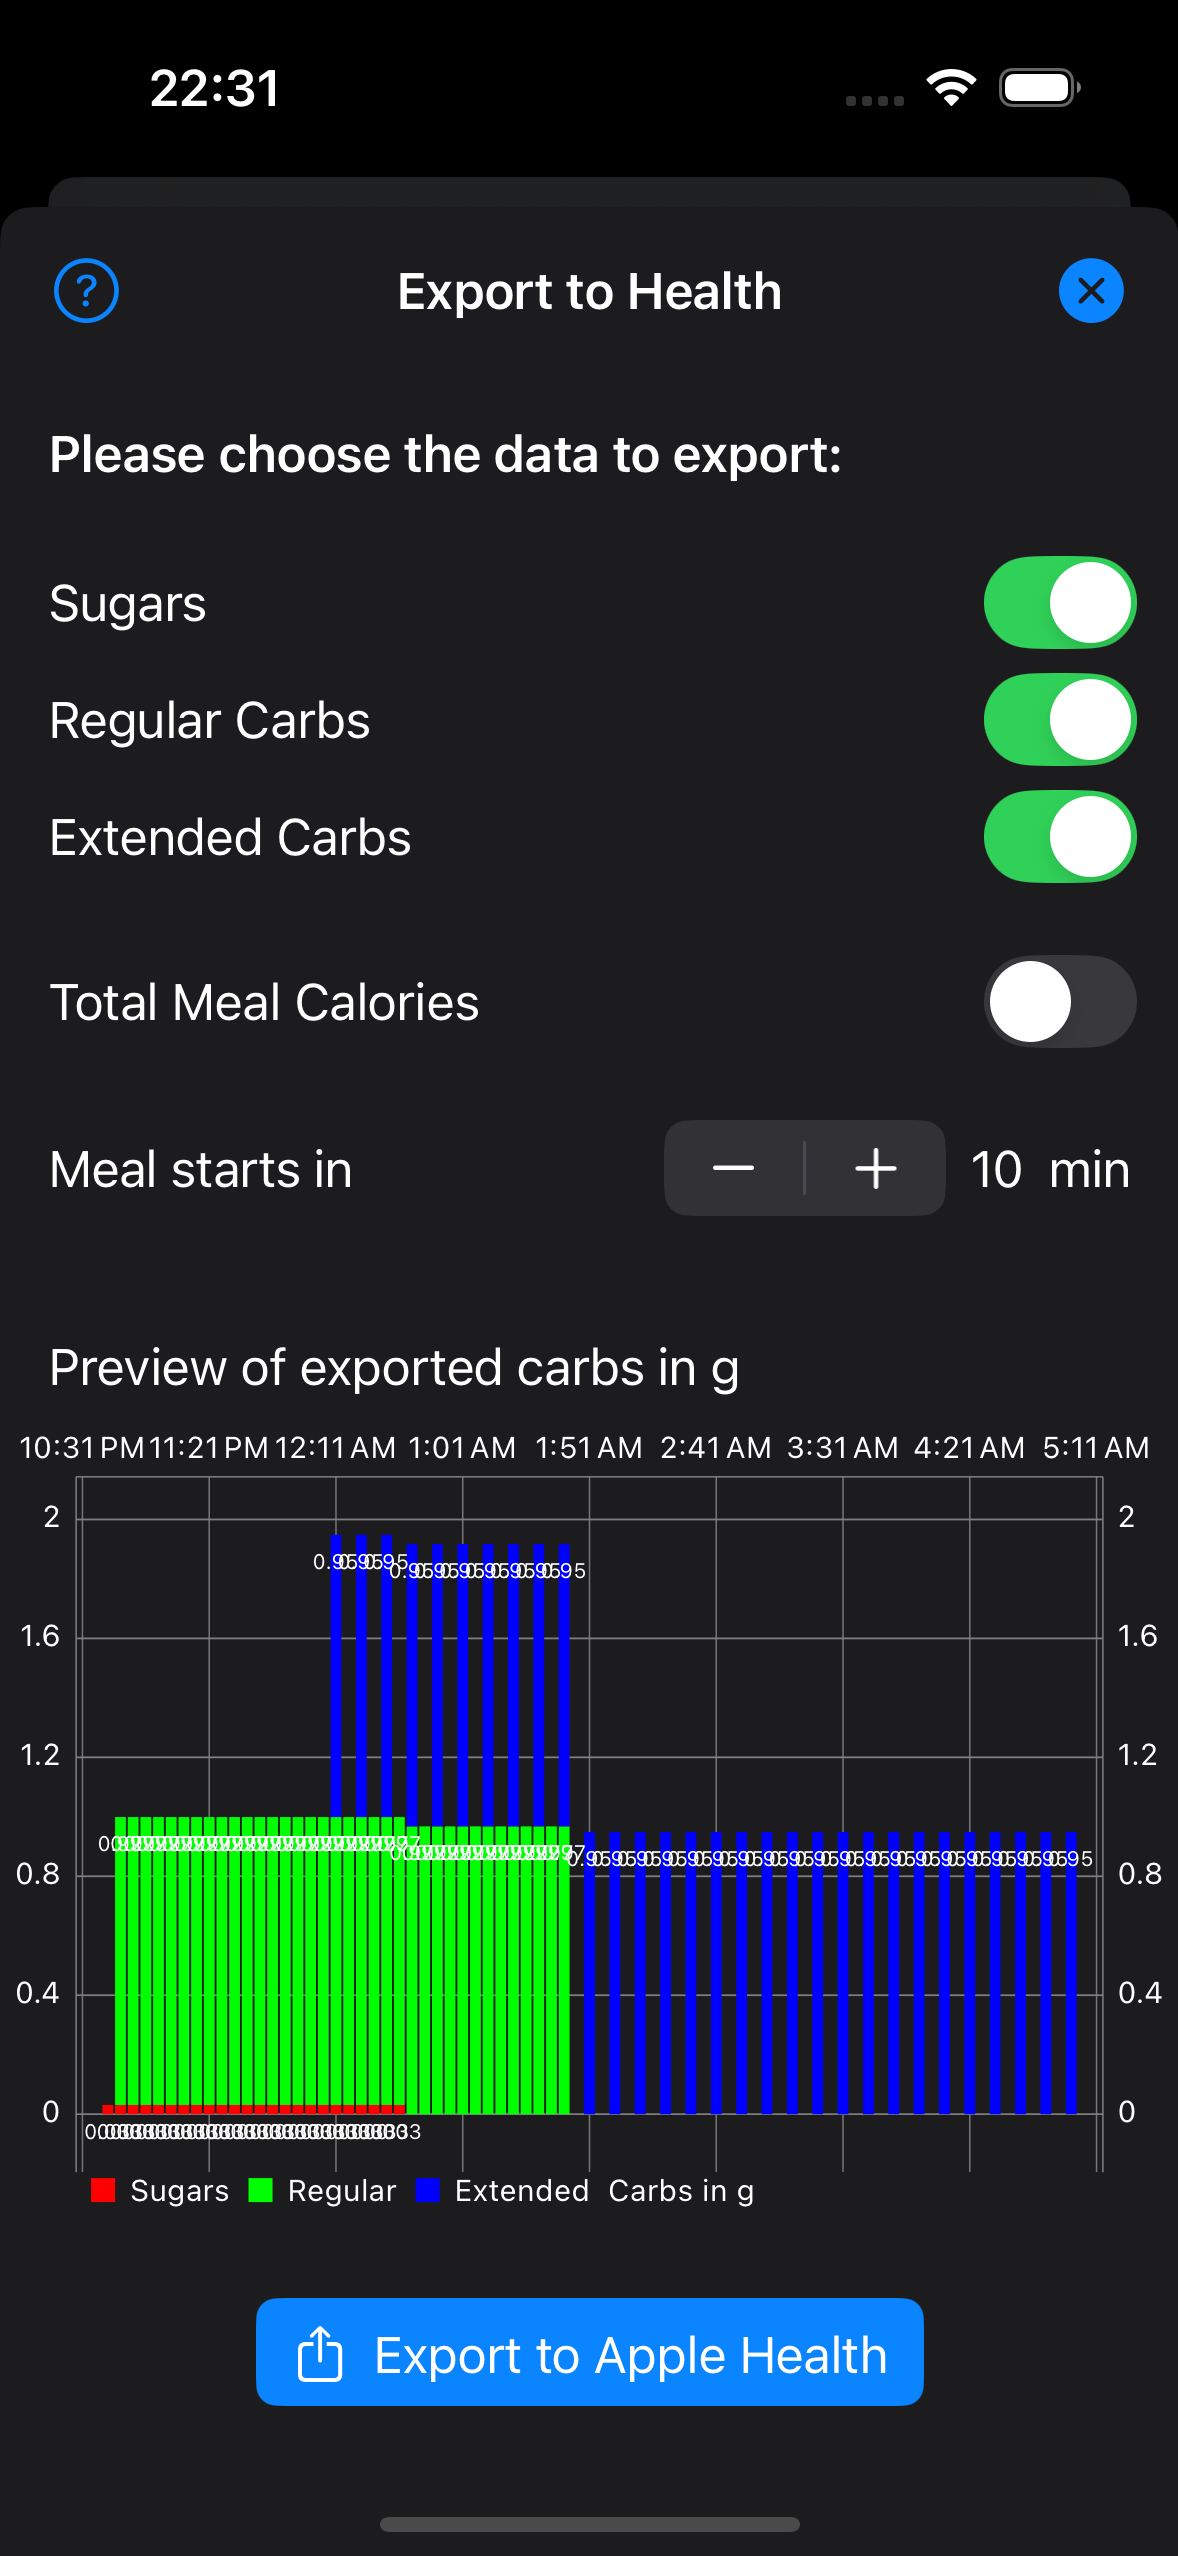
By tapping the export button (a rectangle with an upward arrow), the calculated carbohydrates, as well as the calories of the meal, can be exported to Apple Health.
By toggling the switches on or off, the data to be exported can be selected.
The insulin-to-food ratio can also be adjusted here.
A preview is created for the carbohydrates, showing when each type of carbohydrate will be active. Carbohydrates from sugar are displayed in red, regular carbohydrates in green, and extended carbohydrates in blue.
The distribution of the respective carbohydrates into small portions over the absorption time period is controlled using the interval parameters in the therapy settings.
Connecting Loop
If the carbohydrates calculated by EasyFPU are to be used in Loop, Loop must be allowed to access Apple Health:
Important note for Loop 3
Since Loop version 3, reading data from Apple Health must be explicitly allowed when compiling the Loop app; otherwise, the data transfer will not work. To do this, you need to enable the the build feature "OBSERVE_HEALTH_KIT_CARB_SAMPLES_FROM_OTHER_APPS_ENABLED".
Once EasyFPU has exported the data, open Loop and request a bolus suggestion. The carbohydrates from EasyFPU will now be included, and no manual data entry is required.
Important note for Loopers
This feature can be very useful for type 1 diabetics who manage their insulin therapy through Loop. Loop reads the carbohydrate data exported by EasyFPU, if you allow this in the Apple Health settings, and adjusts the insulin requirements accordingly. Do not enter the meal again in Loop, as this could result in duplicate entries and hypoglycemia.
However, if you accidentally export the carbohydrates of a meal twice, it could lead to hypoglycemia or even severe hypoglycemia.
Two safety mechanisms are in place to prevent this:
- Before exporting data to Apple Health, EasyFPU checks the time of the last data export. If it occurred within a time span of x, a warning will be displayed, and you will need to explicitly confirm the export a second time. The time span x can be configured in the app settings. The default is 15 minutes.
- As a second confirmation before export, you will be asked to authenticate—depending on your iOS settings, via FaceID, TouchID, or passcode.
Screen: Cook & Bake
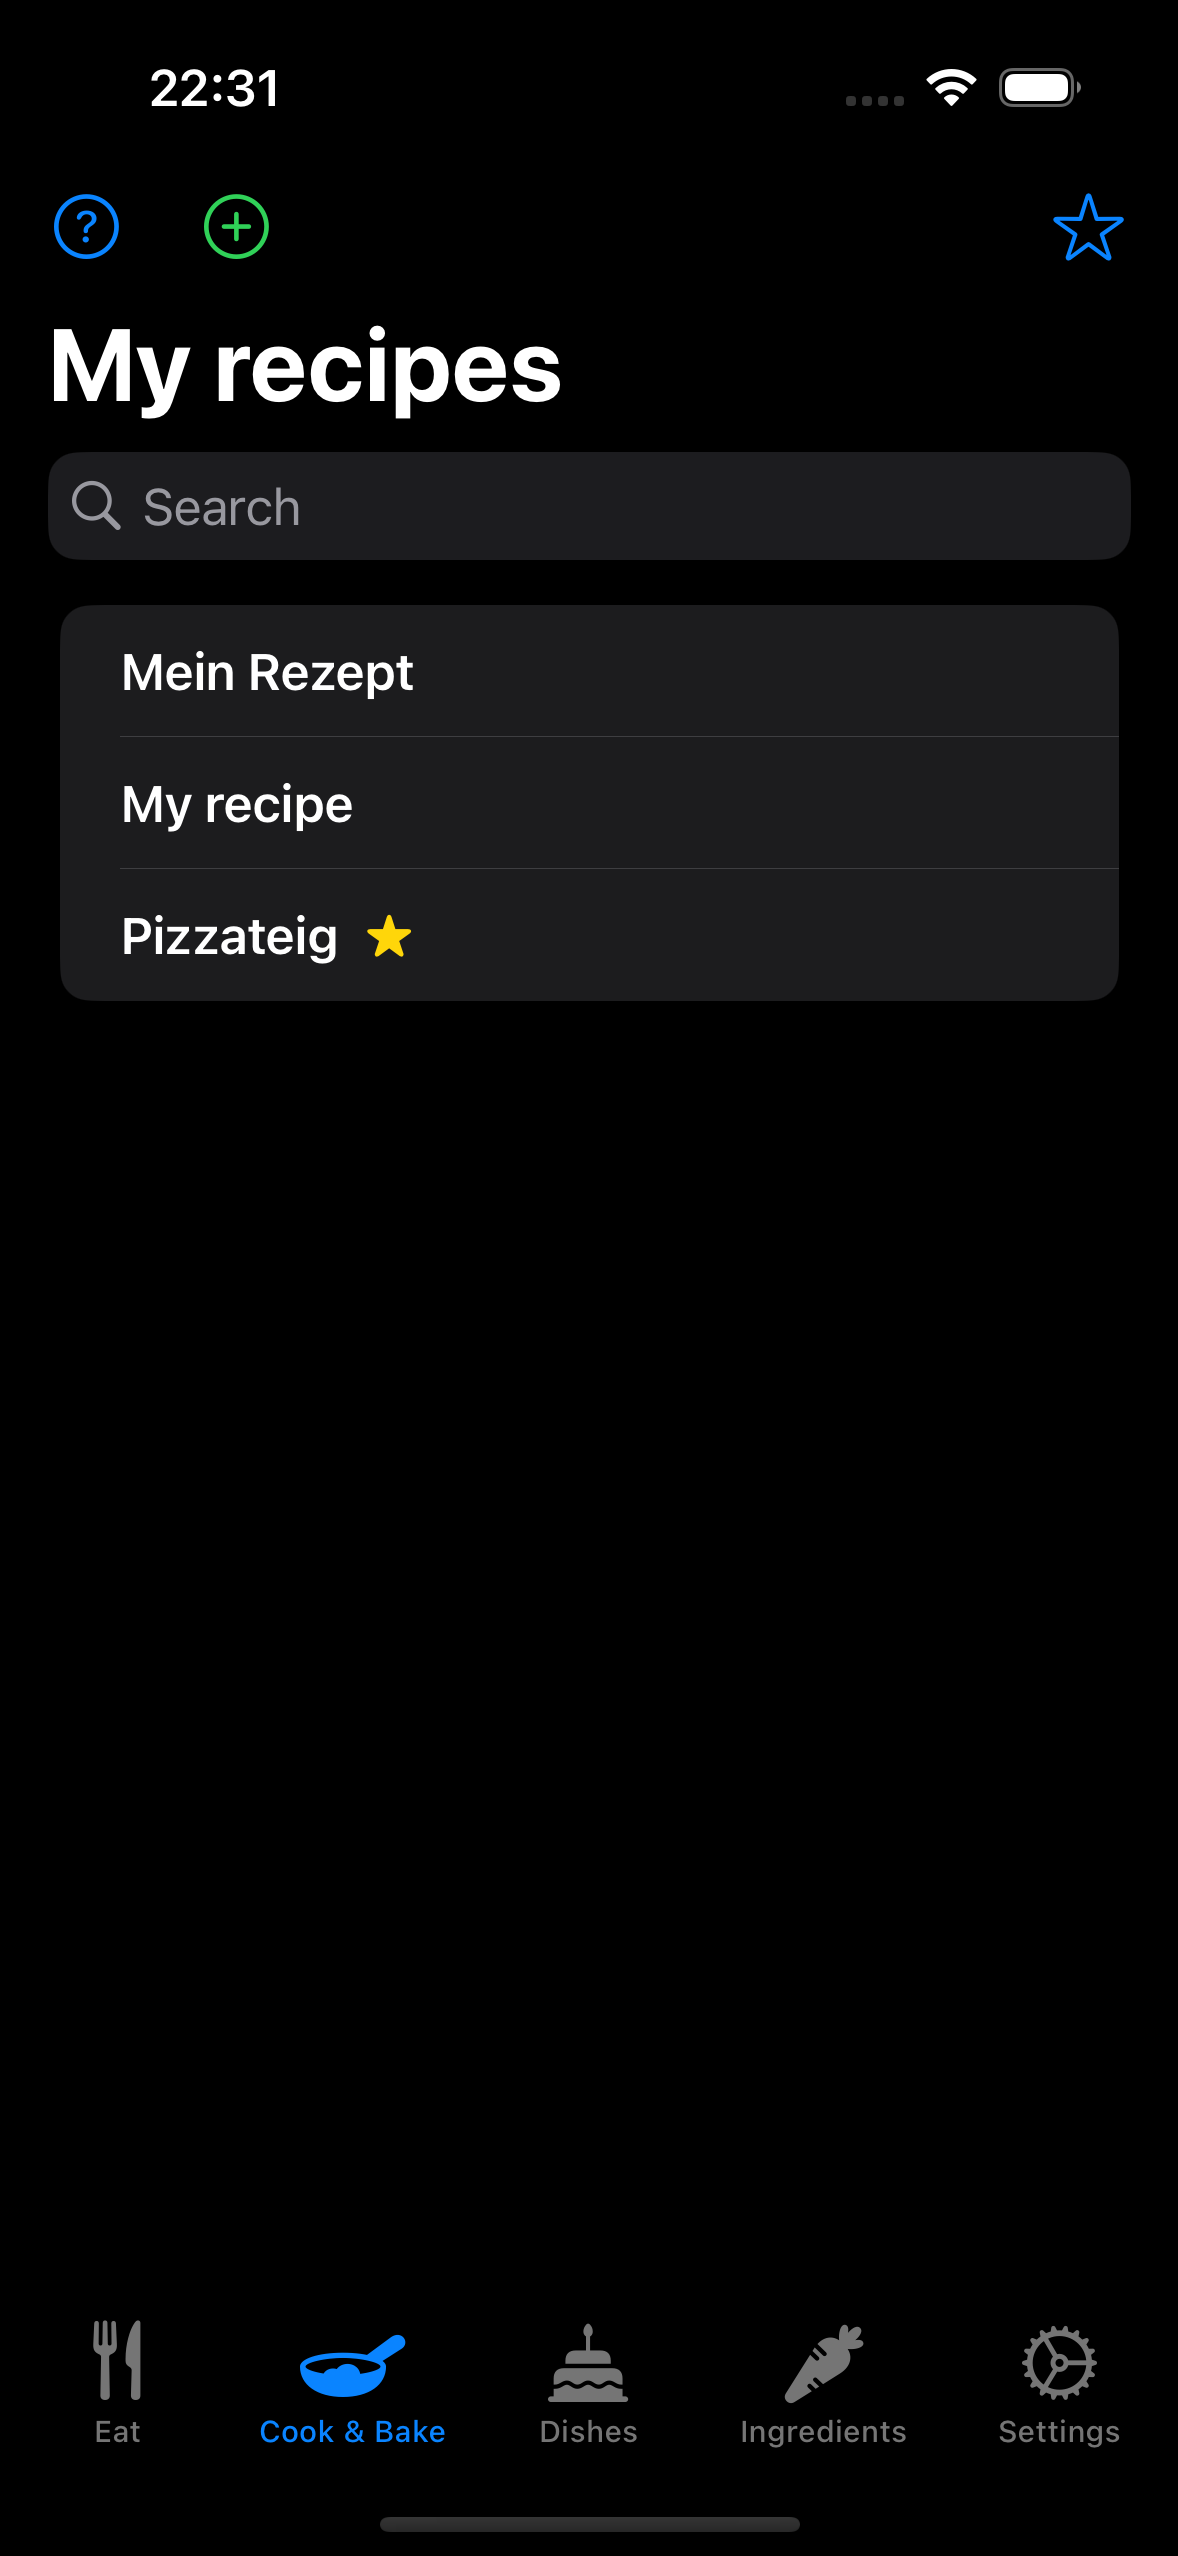
Since version 2.0.0, it is possible to manage your own recipes in EasyFPU. All recipes are displayed in the recipe list.
A recipe consists of one or more ingredients, which must first be created.
To create a new recipe, tap the green plus button at the top of the screen.
Step 1: Select the Ingredients of your Recipe
Just like adding dishes to meals, for a recipe, you first select all the ingredients by tapping on them.
Step 2: Set Name, Total Weight and Number of Portions

For the next important step, the following information must be entered:
- The name of the recipe, e.g., "Marble Cake with Chocolate Glaze"
- The total weight of the finished recipe – this is important for the correct calculation of nutritional values per 100g
- The number of servings that will be cut from the finished product (preferably evenly)
Step 3: Save the Recipe
To save the finished dish, tap the checkmark at the top of the screen. This will add the recipe to the list of dishes. If the total weight of the recipe differs from the sum of its ingredients, this must be confirmed.
Step 4: Edit the Recipe
To edit a recipe, swipe left in the recipe list and select the pencil icon.
Screen: Dishes
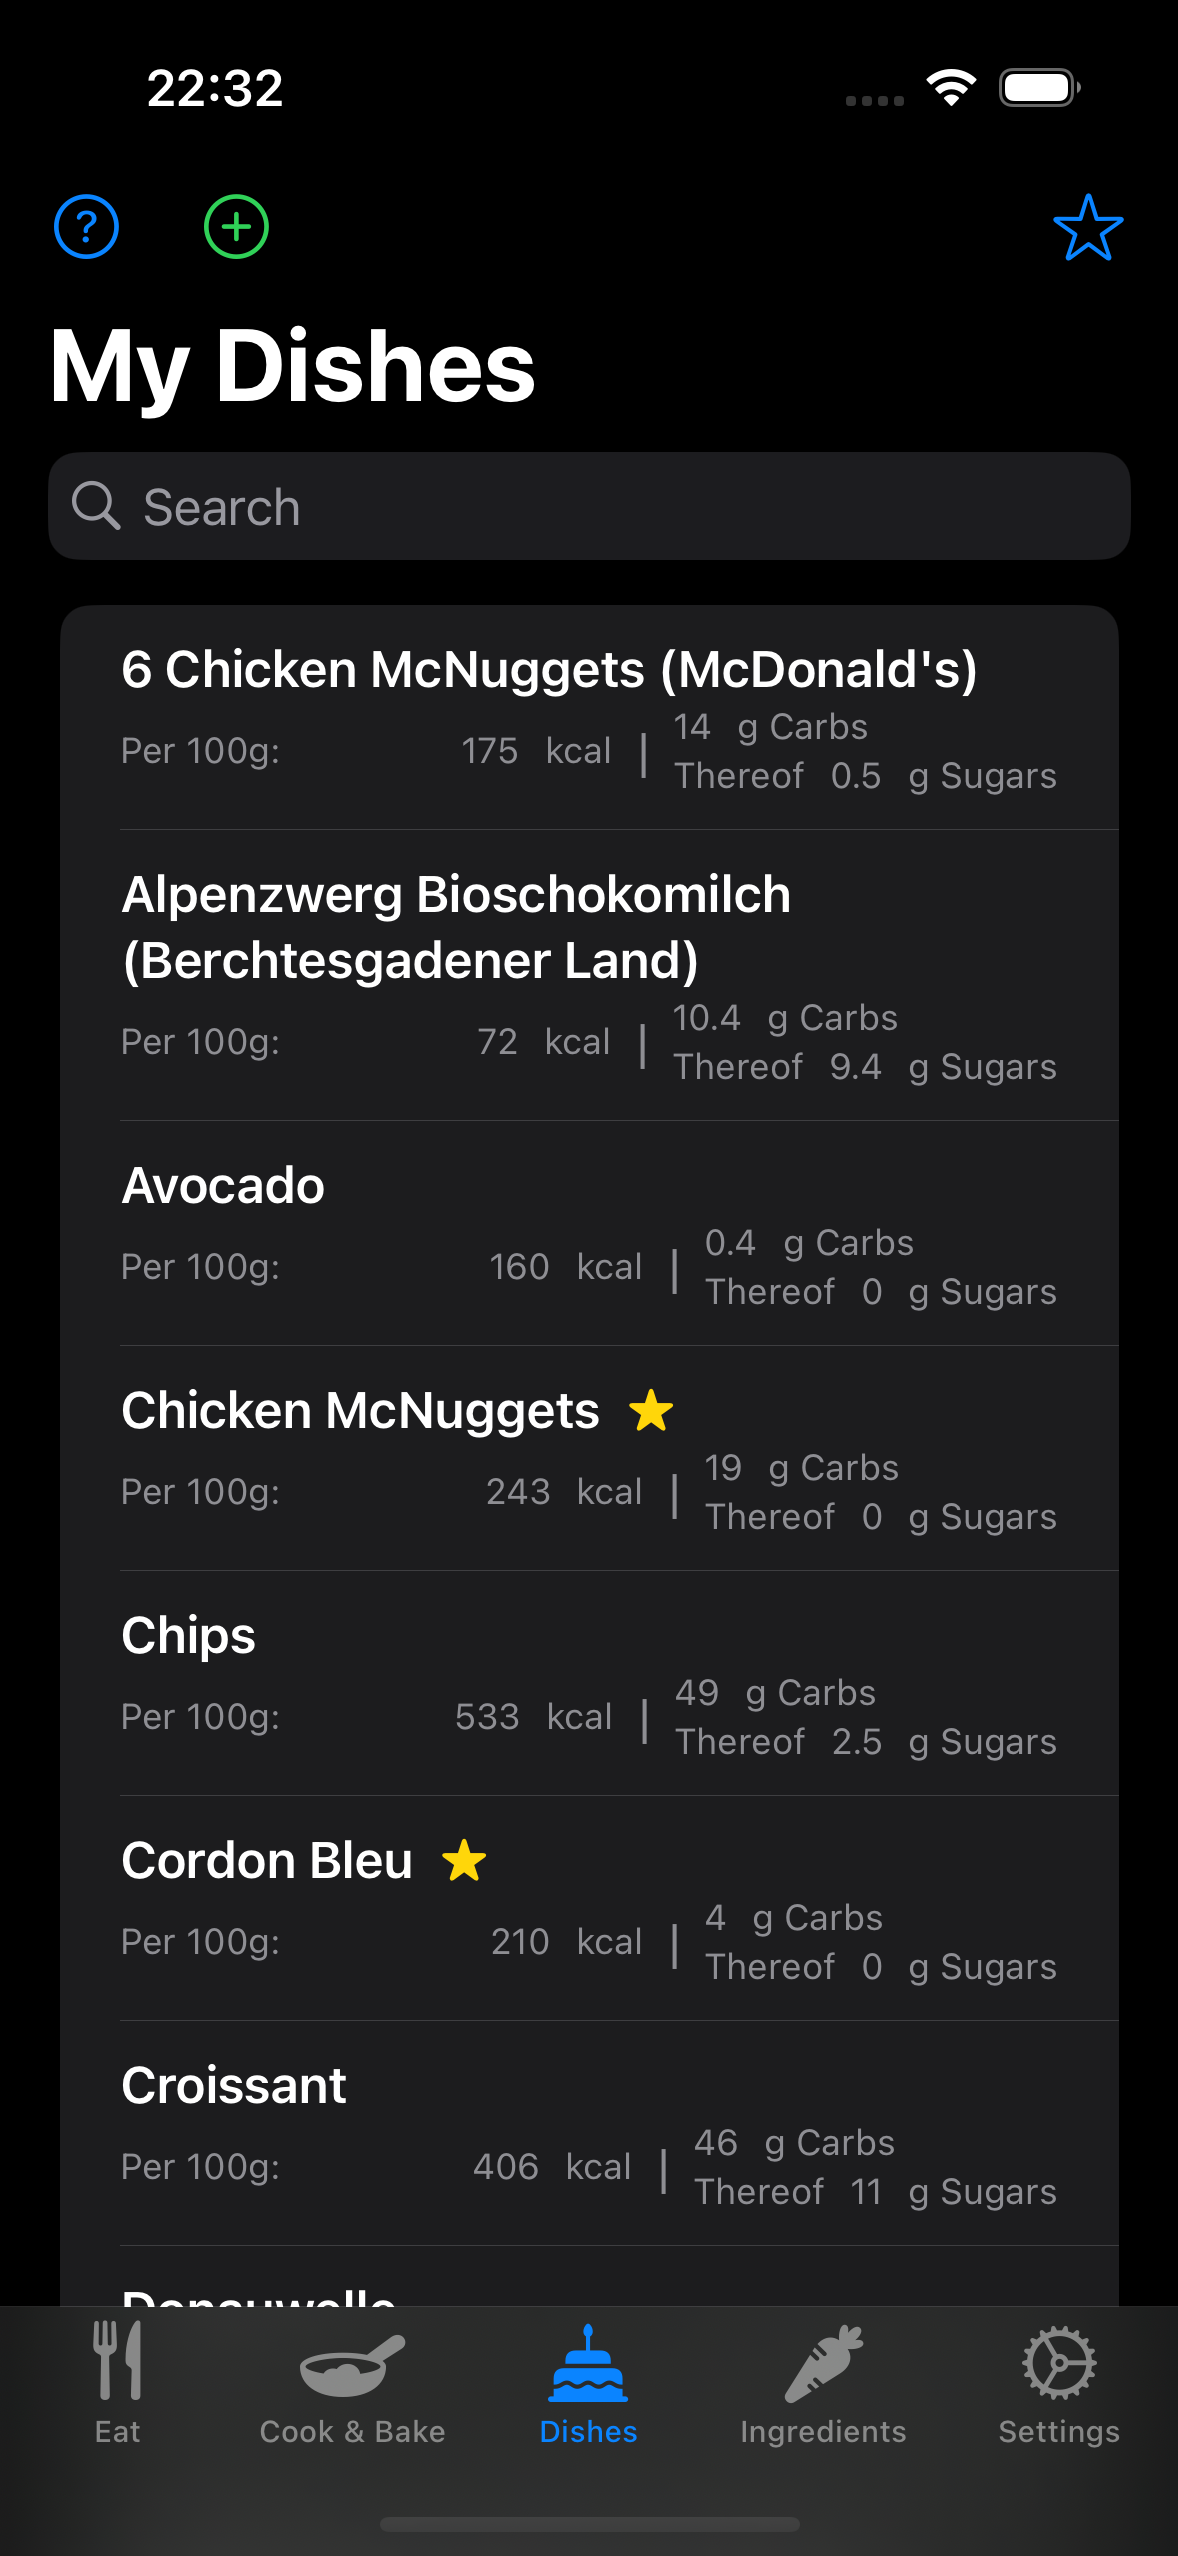
On this screen, the dishes that can be used for meals are managed. The list is initially empty when the app is first opened, but after an update, the existing list of dishes is carried over.
In this app, a "dish" refers to a single component of a meal that is "homogeneous" in itself. Multiple dishes can then be combined to create a meal. For example, the meal "Schnitzel with fries and ketchup" consists of three dishes: the schnitzel, the fries, and the ketchup.
The list of dishes is sorted alphabetically. It is recommended to give each dish a unique name and not use the same name twice.
By clicking the small star above the list of dishes, only the dishes marked as favorites will be displayed. Additionally, you can search for dishes using the search field (searching within the names).
Swiping left allows you to edit, delete, or duplicate the dish.
Swiping right allows you to share it with other EasyFPU users or move it to the ingredients list.
To create a new dish, tap the large green plus symbol at the top of the screen. There are three options for creating a new dish.
Option 1: Manual Entry
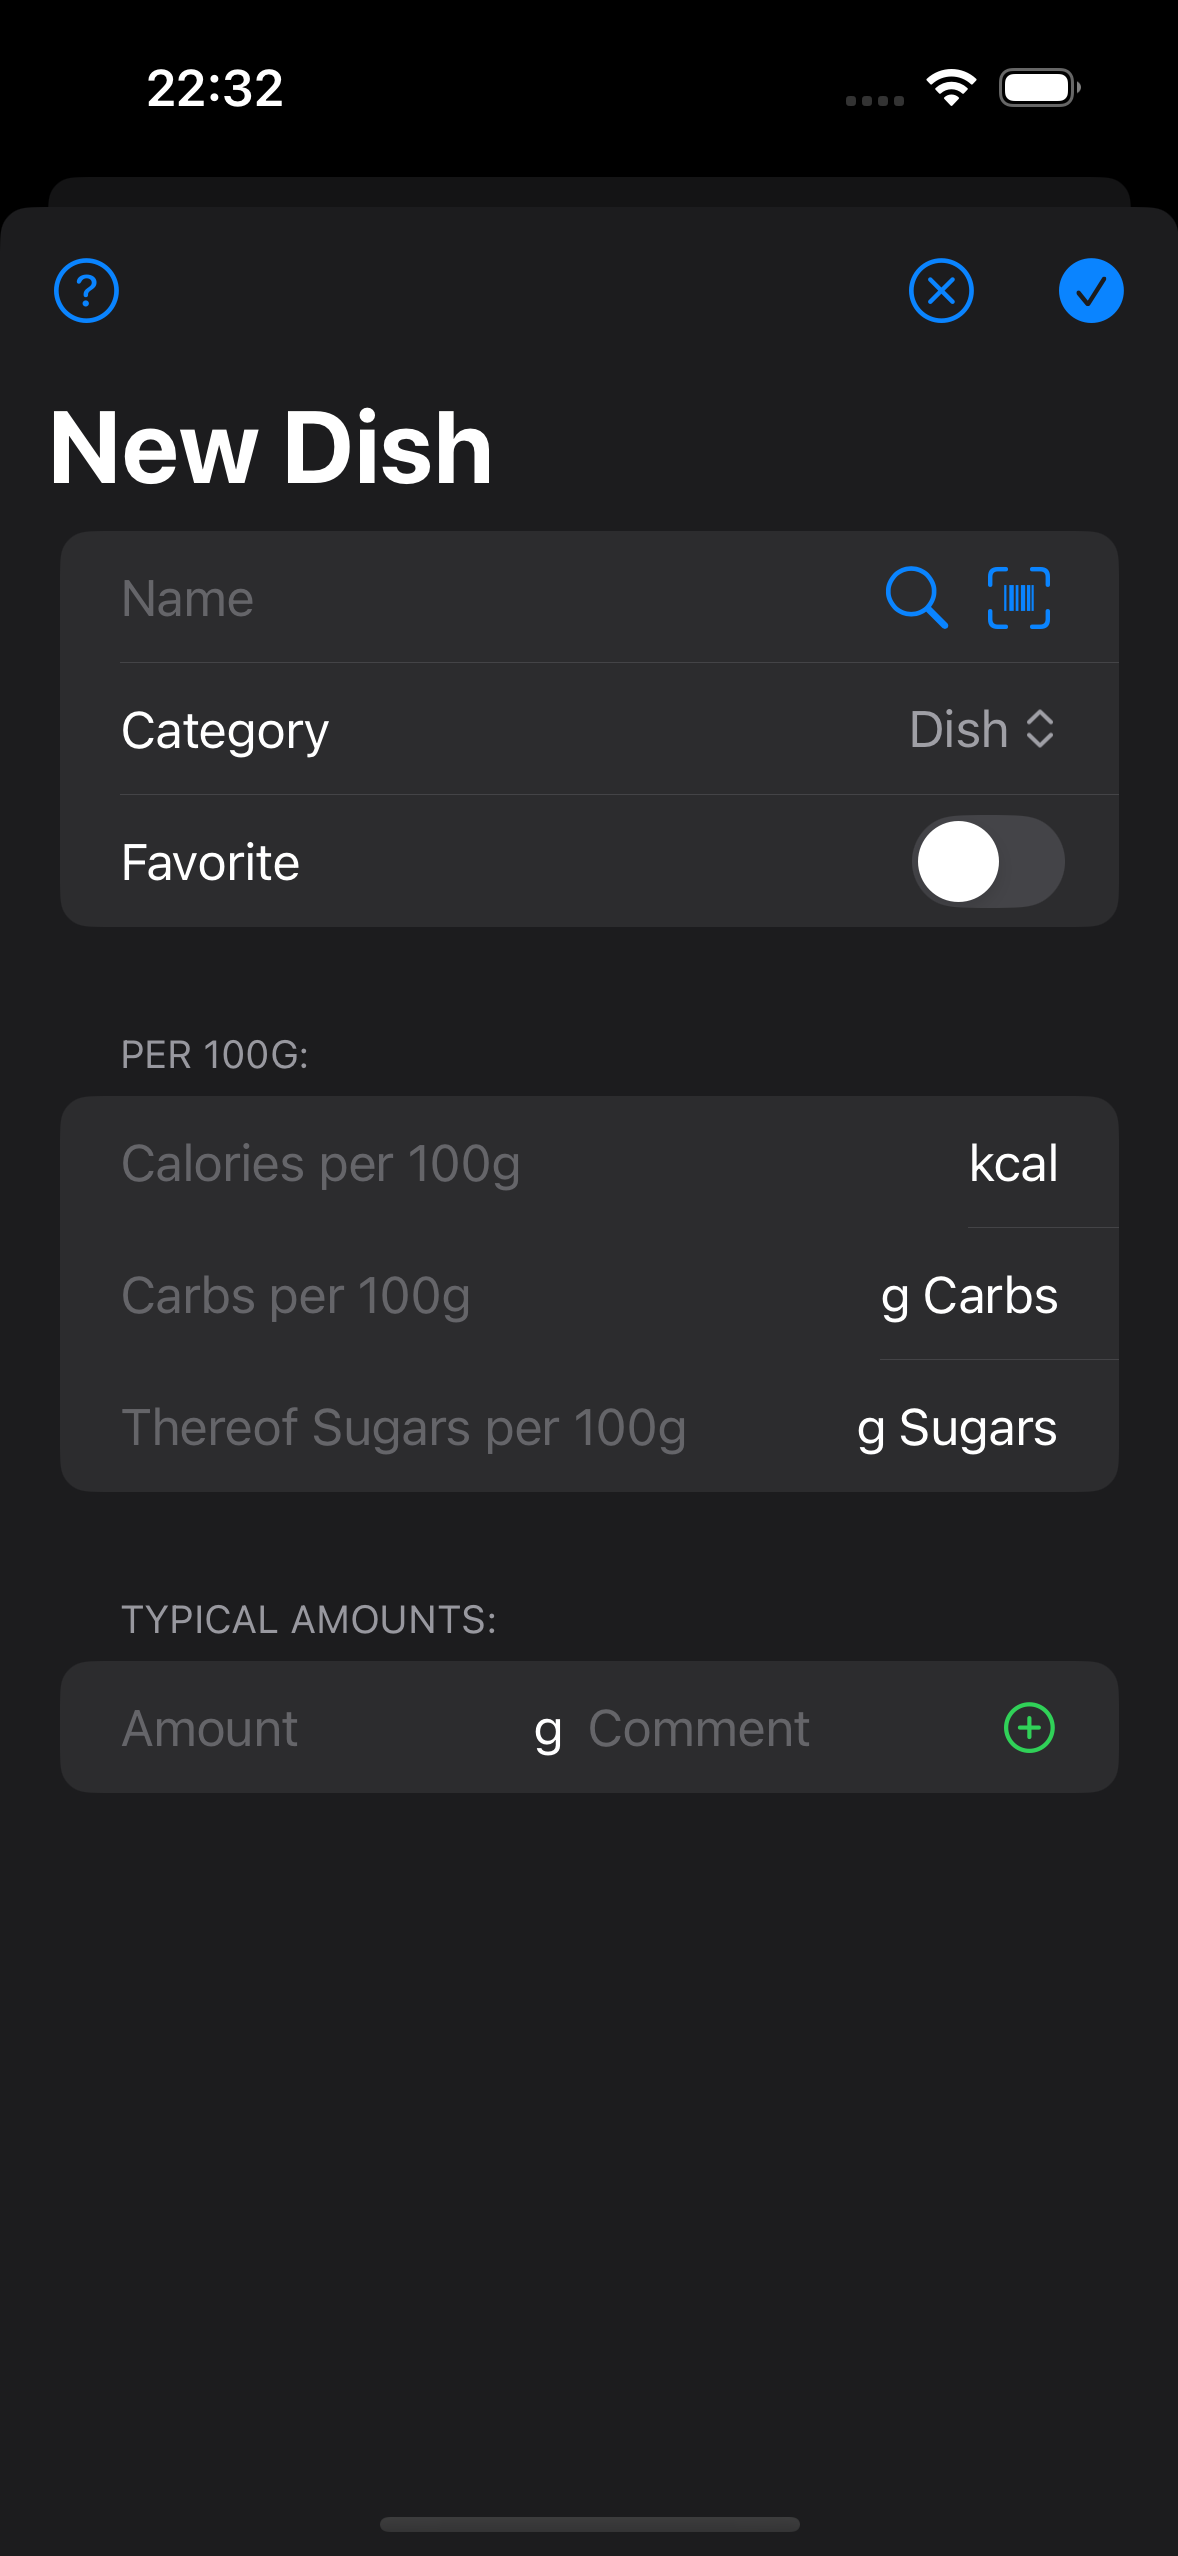
A dialog opens to enter the necessary data:
- Name (required): The name of the dish
- Favorite dish: Option to display the dish in the list of favorites
- Calories per 100g (required): The calories of the dish per 100g in kcal
- Carbohydrates per 100g (required): The carbohydrates of the dish per 100g in grams
- Of which sugar per 100g (required): The amount of carbohydrates from sugar per 100g as a subset of the carbohydrates
Additionally, you can optionally add as many typical amounts of the dish as needed, each with a comment. Confirm the input by tapping the small green plus symbol.
The typical amounts will later appear when selecting the dish in the calculation dialog. Entering typical amounts is especially useful for known amounts (e.g., packaged food or "4 pieces" of Chicken McNuggets) and makes the app easier to use, especially for children.
After saving, the newly created dish will appear in the list of dishes (sorted alphabetically).
Option 2: Search in Food Database
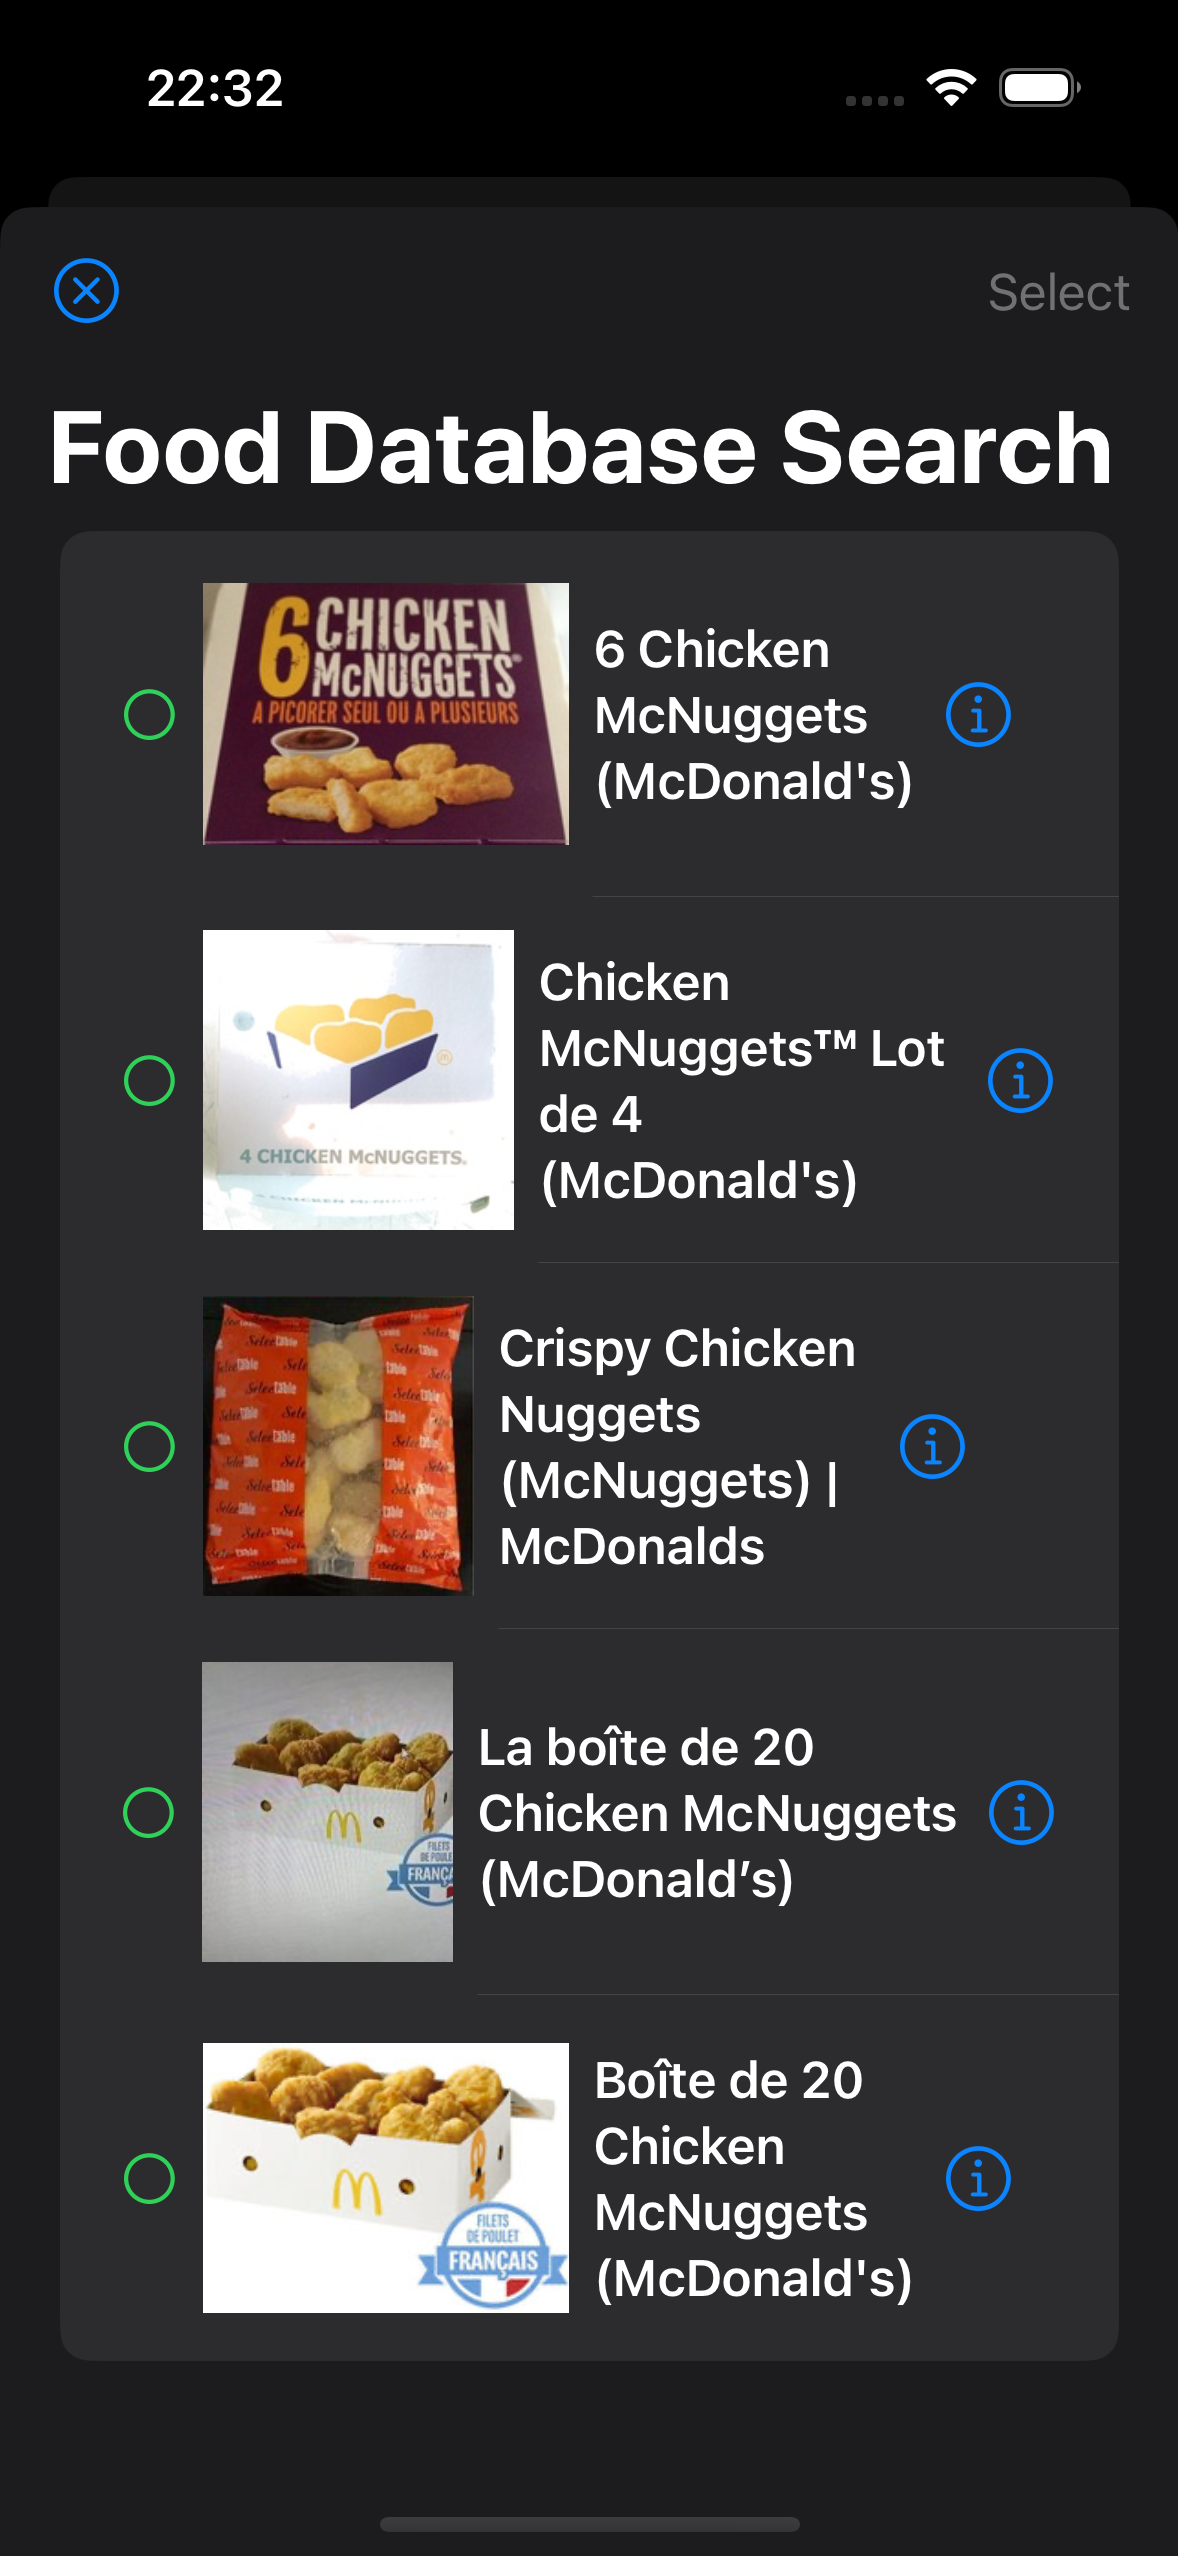
Since version 2.0.0, a dish can be searched in a food database. To do this, enter the search term in the name field and then tap the search icon.
Currently, only one food database is integrated, namely OpenFoodFacts. OpenFoodFacts is an open food database, meaning anyone can contribute. This means that incorrect nutritional values may also be listed. Therefore, please always verify that the nutritional values found in the database match the actual values. You can use the detail view, where you can also find product images that can be zoomed in on.
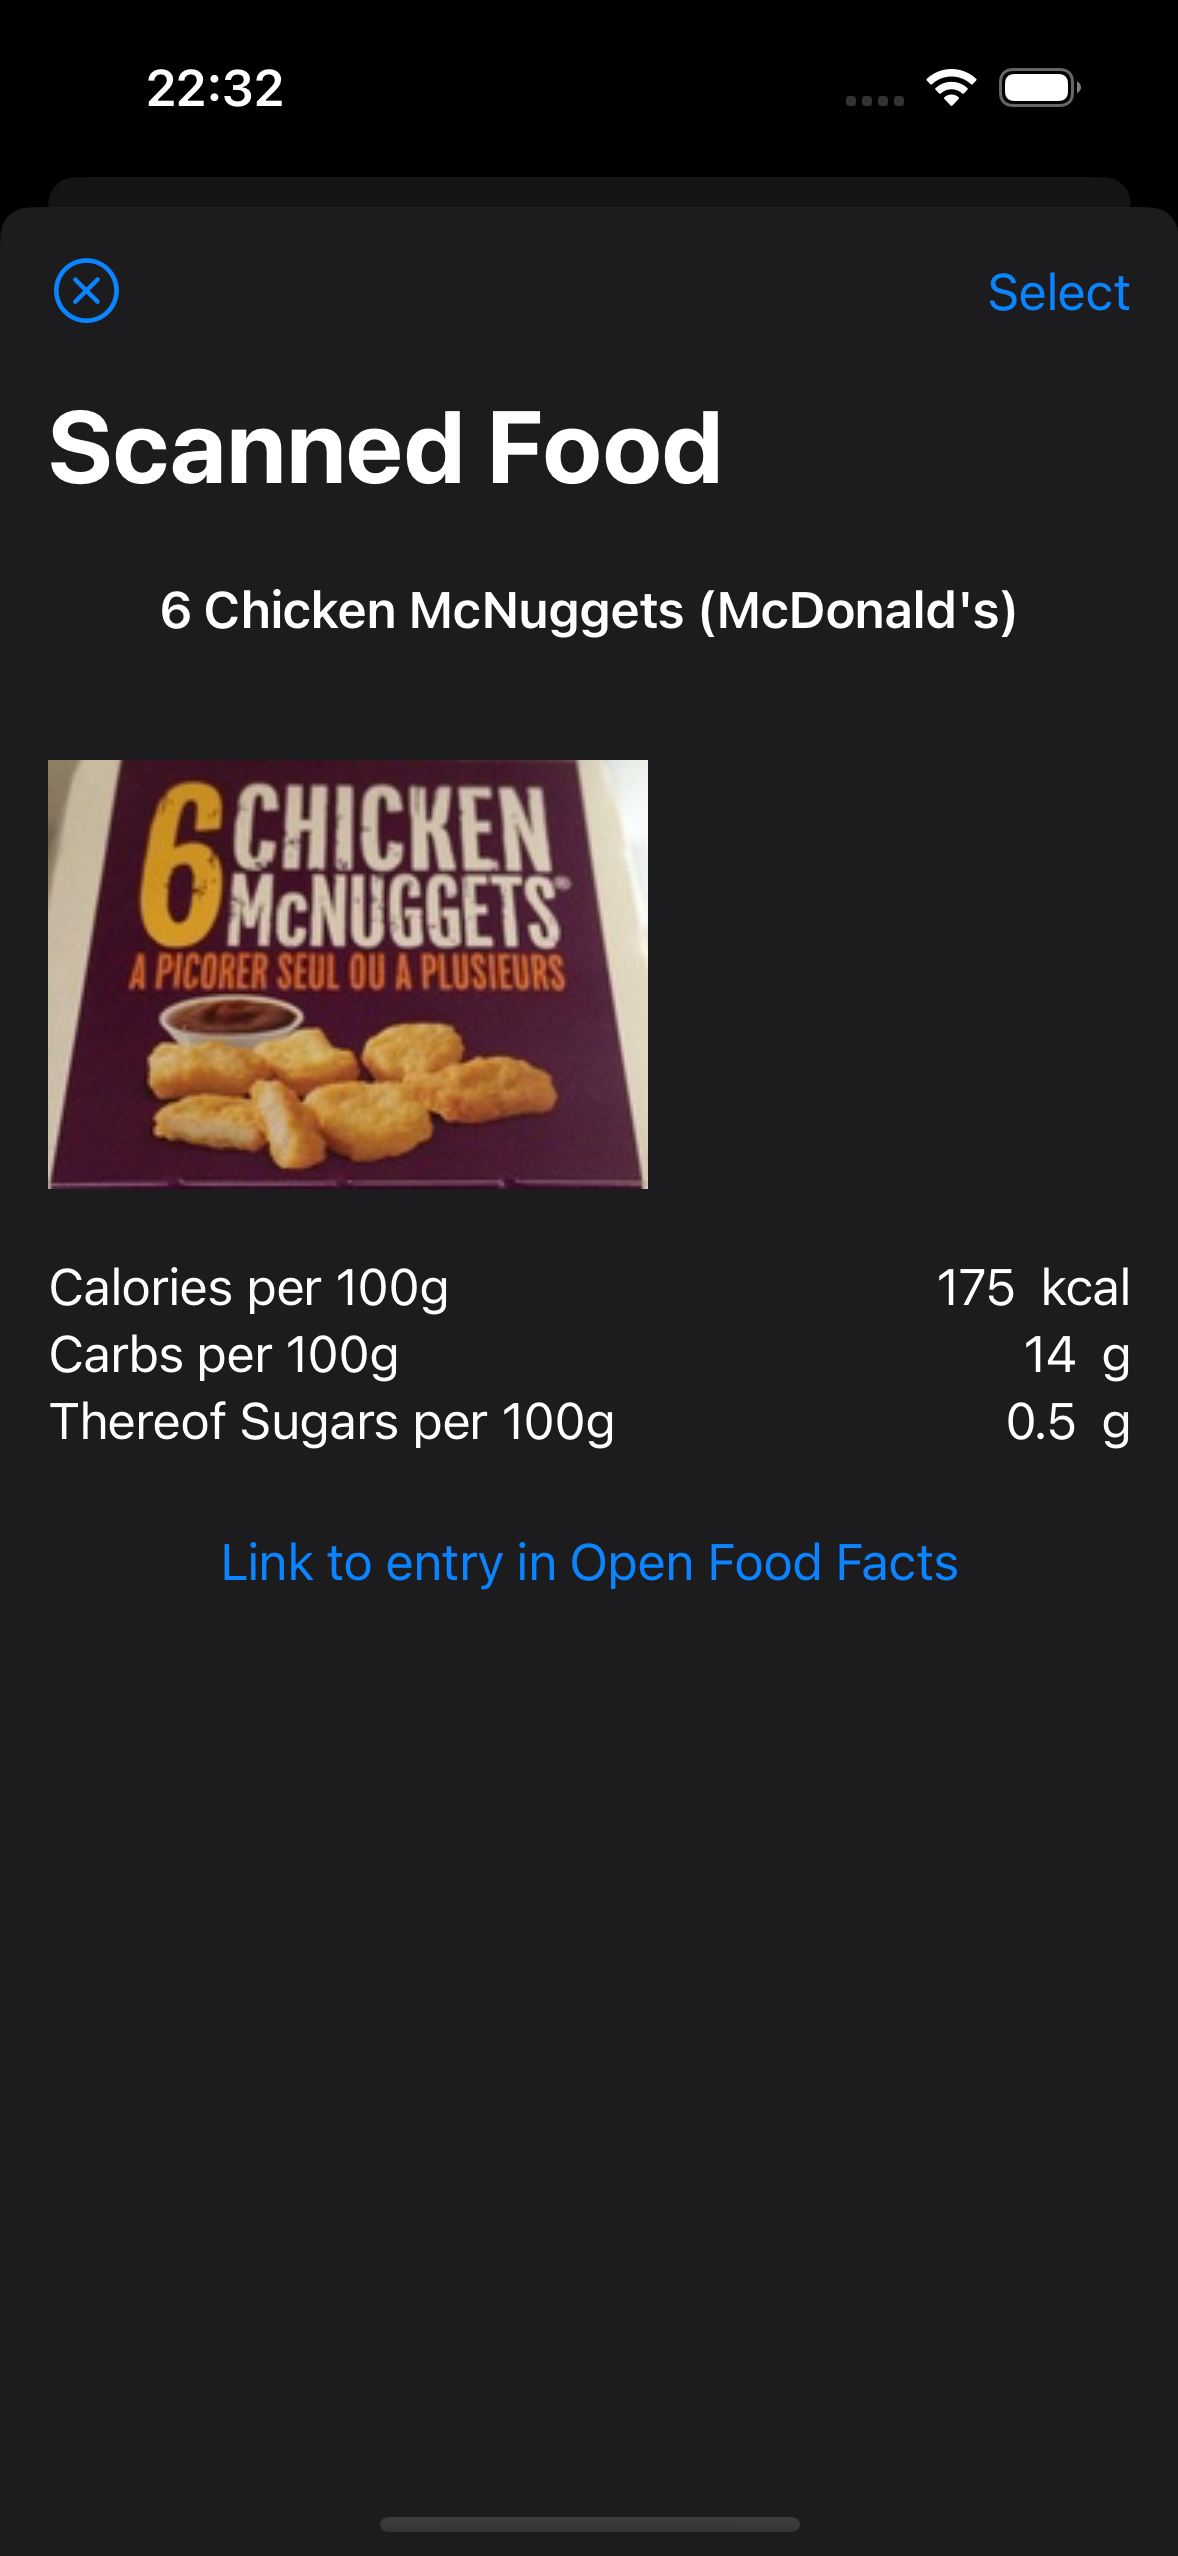
Option 3: Scan a Barcode
To scan a barcode, tap the scan icon next to the search icon, then point your device’s camera at the product's barcode. If the product is found in the database, the detail view will appear, where you can decide whether to accept the product or not.
If scanning is not possible, simply swipe the camera window downwards.
Screen: Ingredients
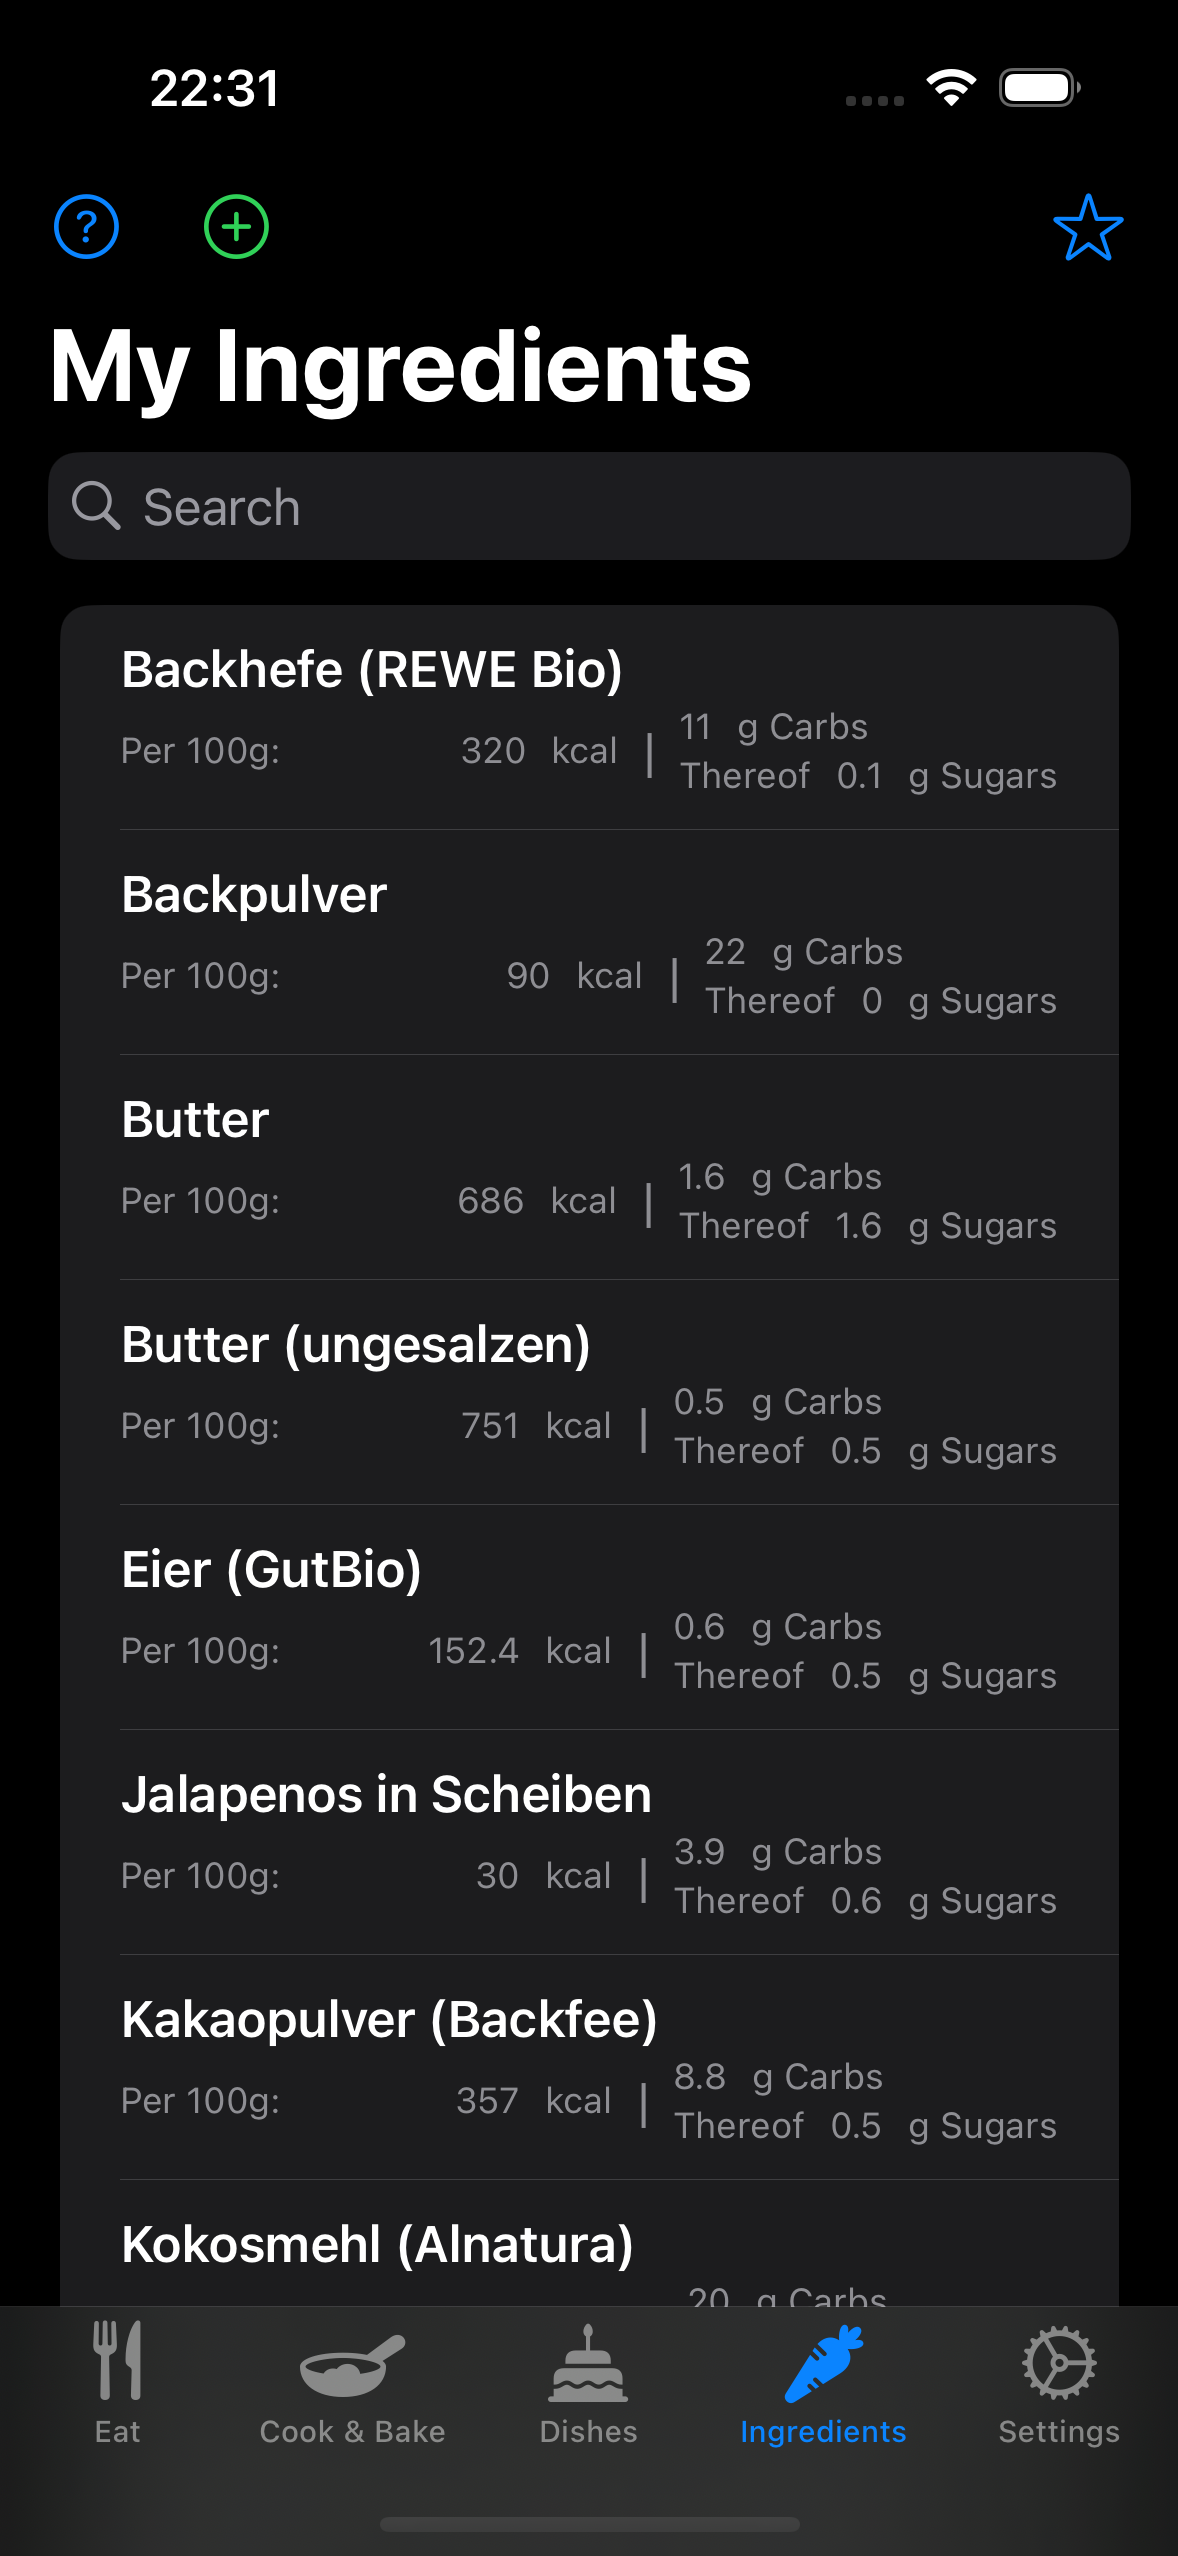
To create a recipe, you first need all of its ingredients in the ingredients list. The ingredients list is located in the "Ingredients" tab, next to the products. Ingredients can be moved by swiping right between the product and ingredients lists.
Adding ingredients works the same way as adding dishes – through manual entry, searching in a food database, or scanning a barcode. The only difference is selecting the category "Ingredient" instead of "Product."
Screen: Settings
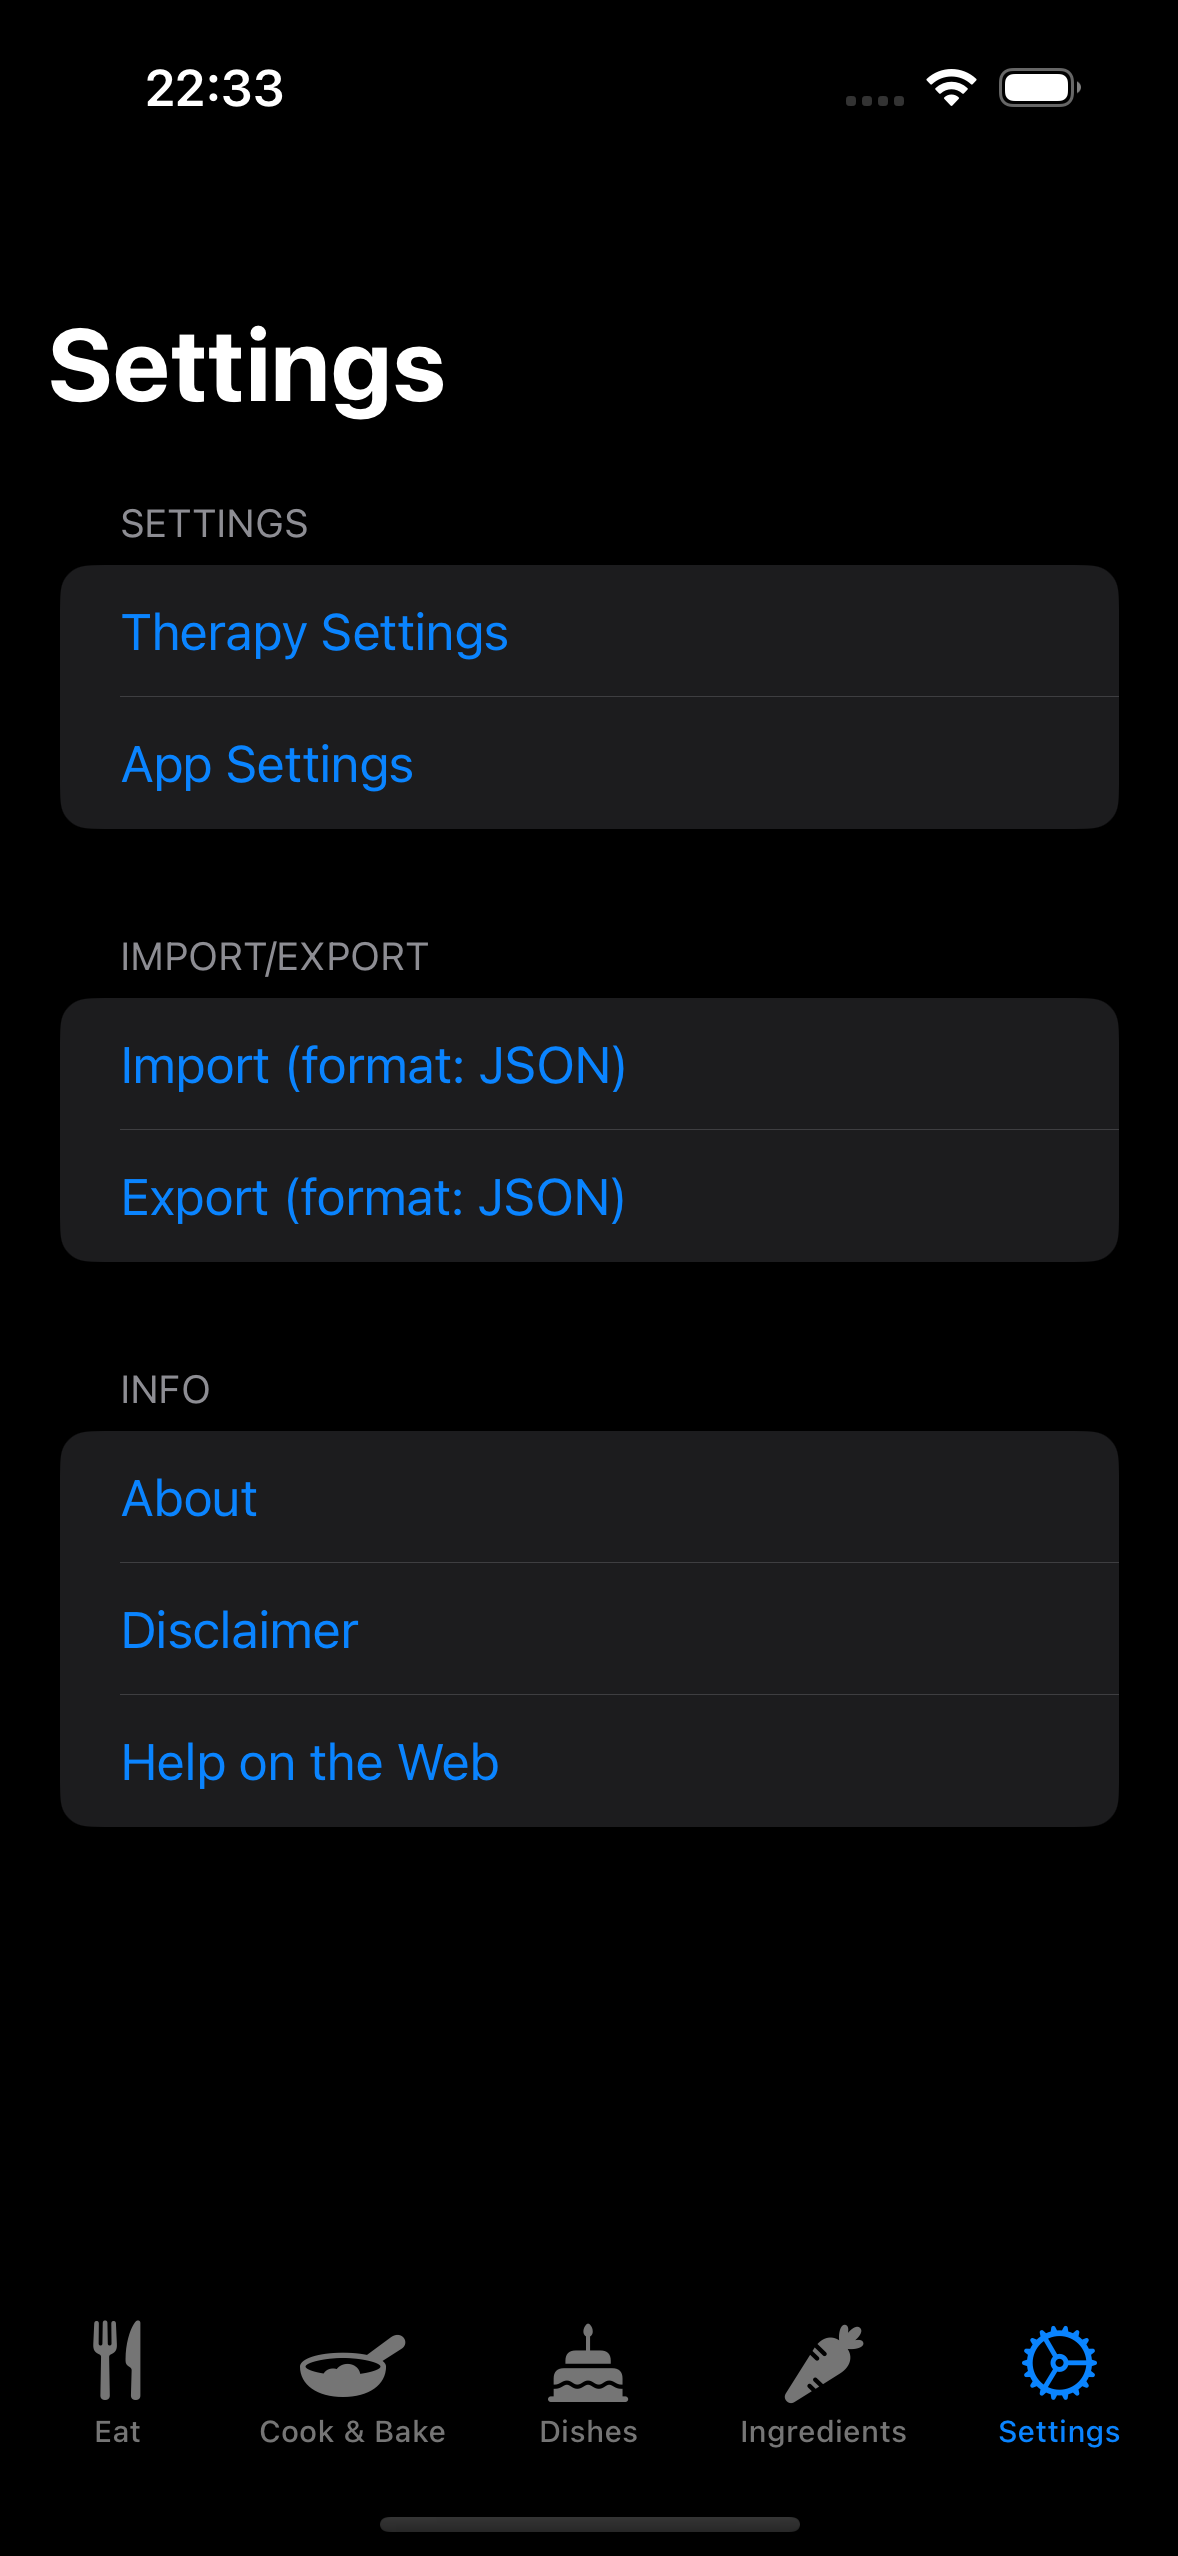
- Therapy Settings: Opens the dialog for editing the absorption schemes
- App Settings: Opens the dialog for various app settings
- Import (Format: JSON): Imports the database from a JSON file – you can then choose whether to replace or append the existing food list
- Export (Format: JSON): Exports the food list (including dishes, ingredients, and recipes) for backup or sharing with others
- About: Information about the app
- Disclaimer: Displays the Disclaimer
- Online Help: The link to this documentation
Therapy Settings
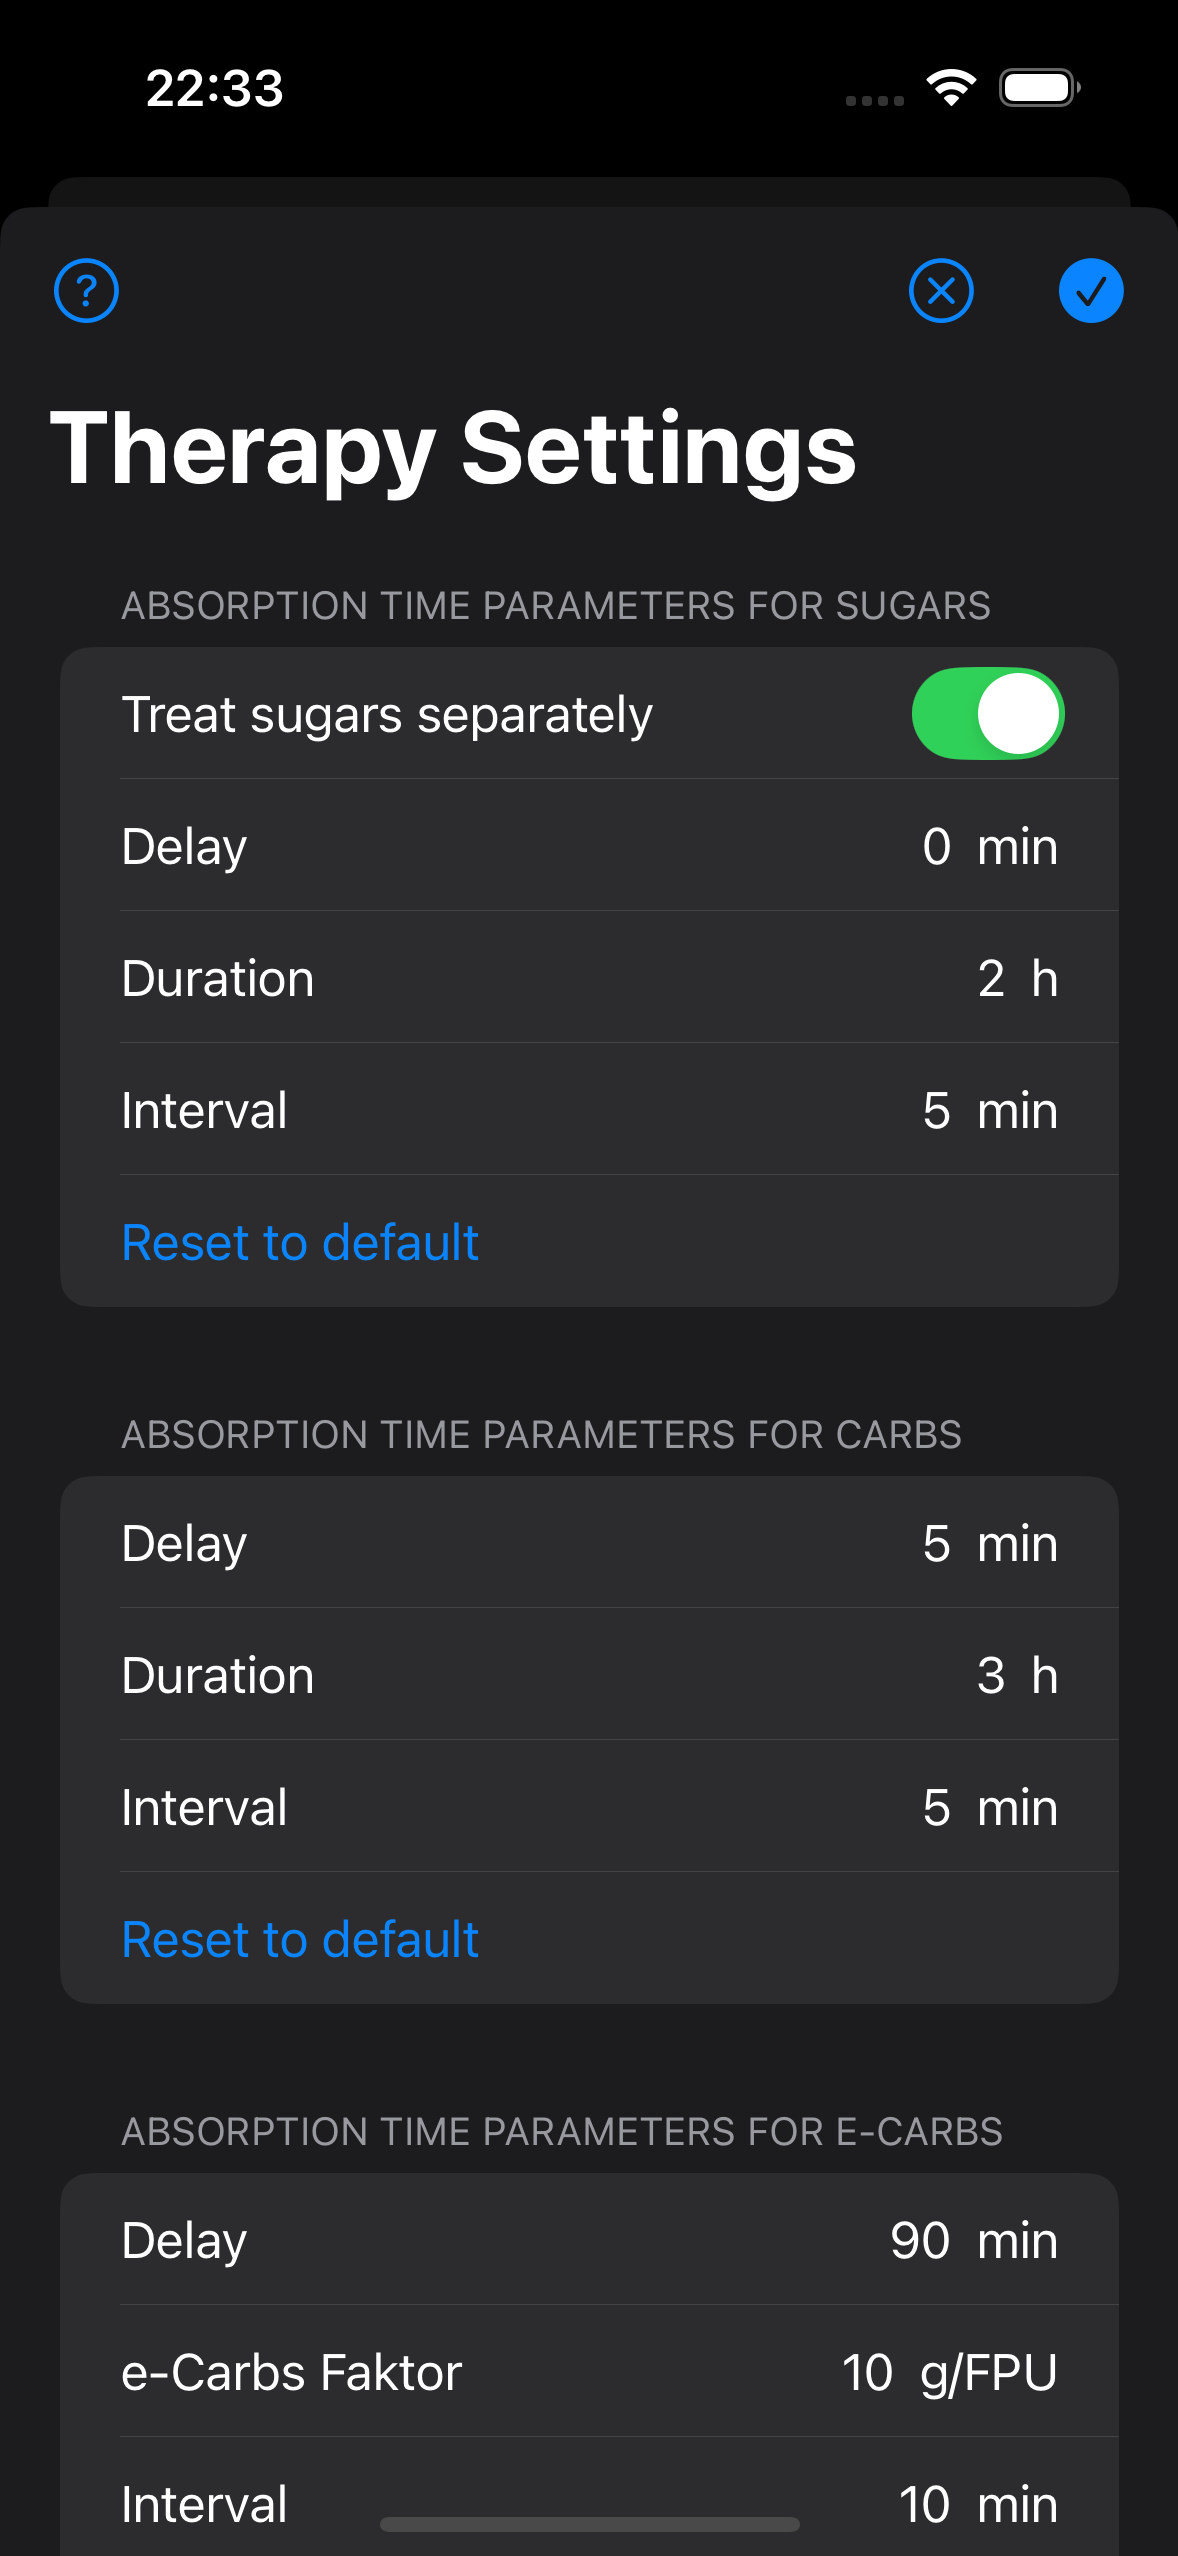
In the therapy settings, you can edit the absorption schemes for carbohydrates from sugar, regular carbohydrates, and extended carbohydrates.
Each of these absorption schemes has three parameters:
- Delay: The time your body needs to digest the respective carbohydrates, meaning that after this time, these carbohydrates will affect your blood sugar.
- Absorption Time: The duration during which these carbohydrates affect your blood sugar, after they have started (this parameter can only be entered for sugar and regular carbohydrates, while it is calculated for extended carbohydrates).
- Interval: This parameter is only needed for exporting carbohydrates to Apple Health. The total amount of each carbohydrate type is evenly distributed over the absorption time for export. For example, with a 3-hour (180 minutes) absorption time and a 10-minute interval, a carbohydrate amount of 36g will be divided into 18 parts of 2g each: 36g / (180min / 10min).
Absorption Scheme for Carbs from Sugars
You can choose whether carbohydrates from sugar should be reported separately from regular carbohydrates. If you do not use this option, carbohydrates from sugar will be treated as regular carbohydrates.
Carbohydrates from sugar are typically absorbed relatively quickly. The default setting is 2 hours with no delay (immediate effect).
Absorption Schemme for Regular Carbs
If you have selected the separate treatment of carbohydrates from sugar, they will be subtracted from the regular carbohydrates.
Regular carbohydrates are typically absorbed more slowly than those from sugar. The default setting is 3 hours with a 5-minute delay.
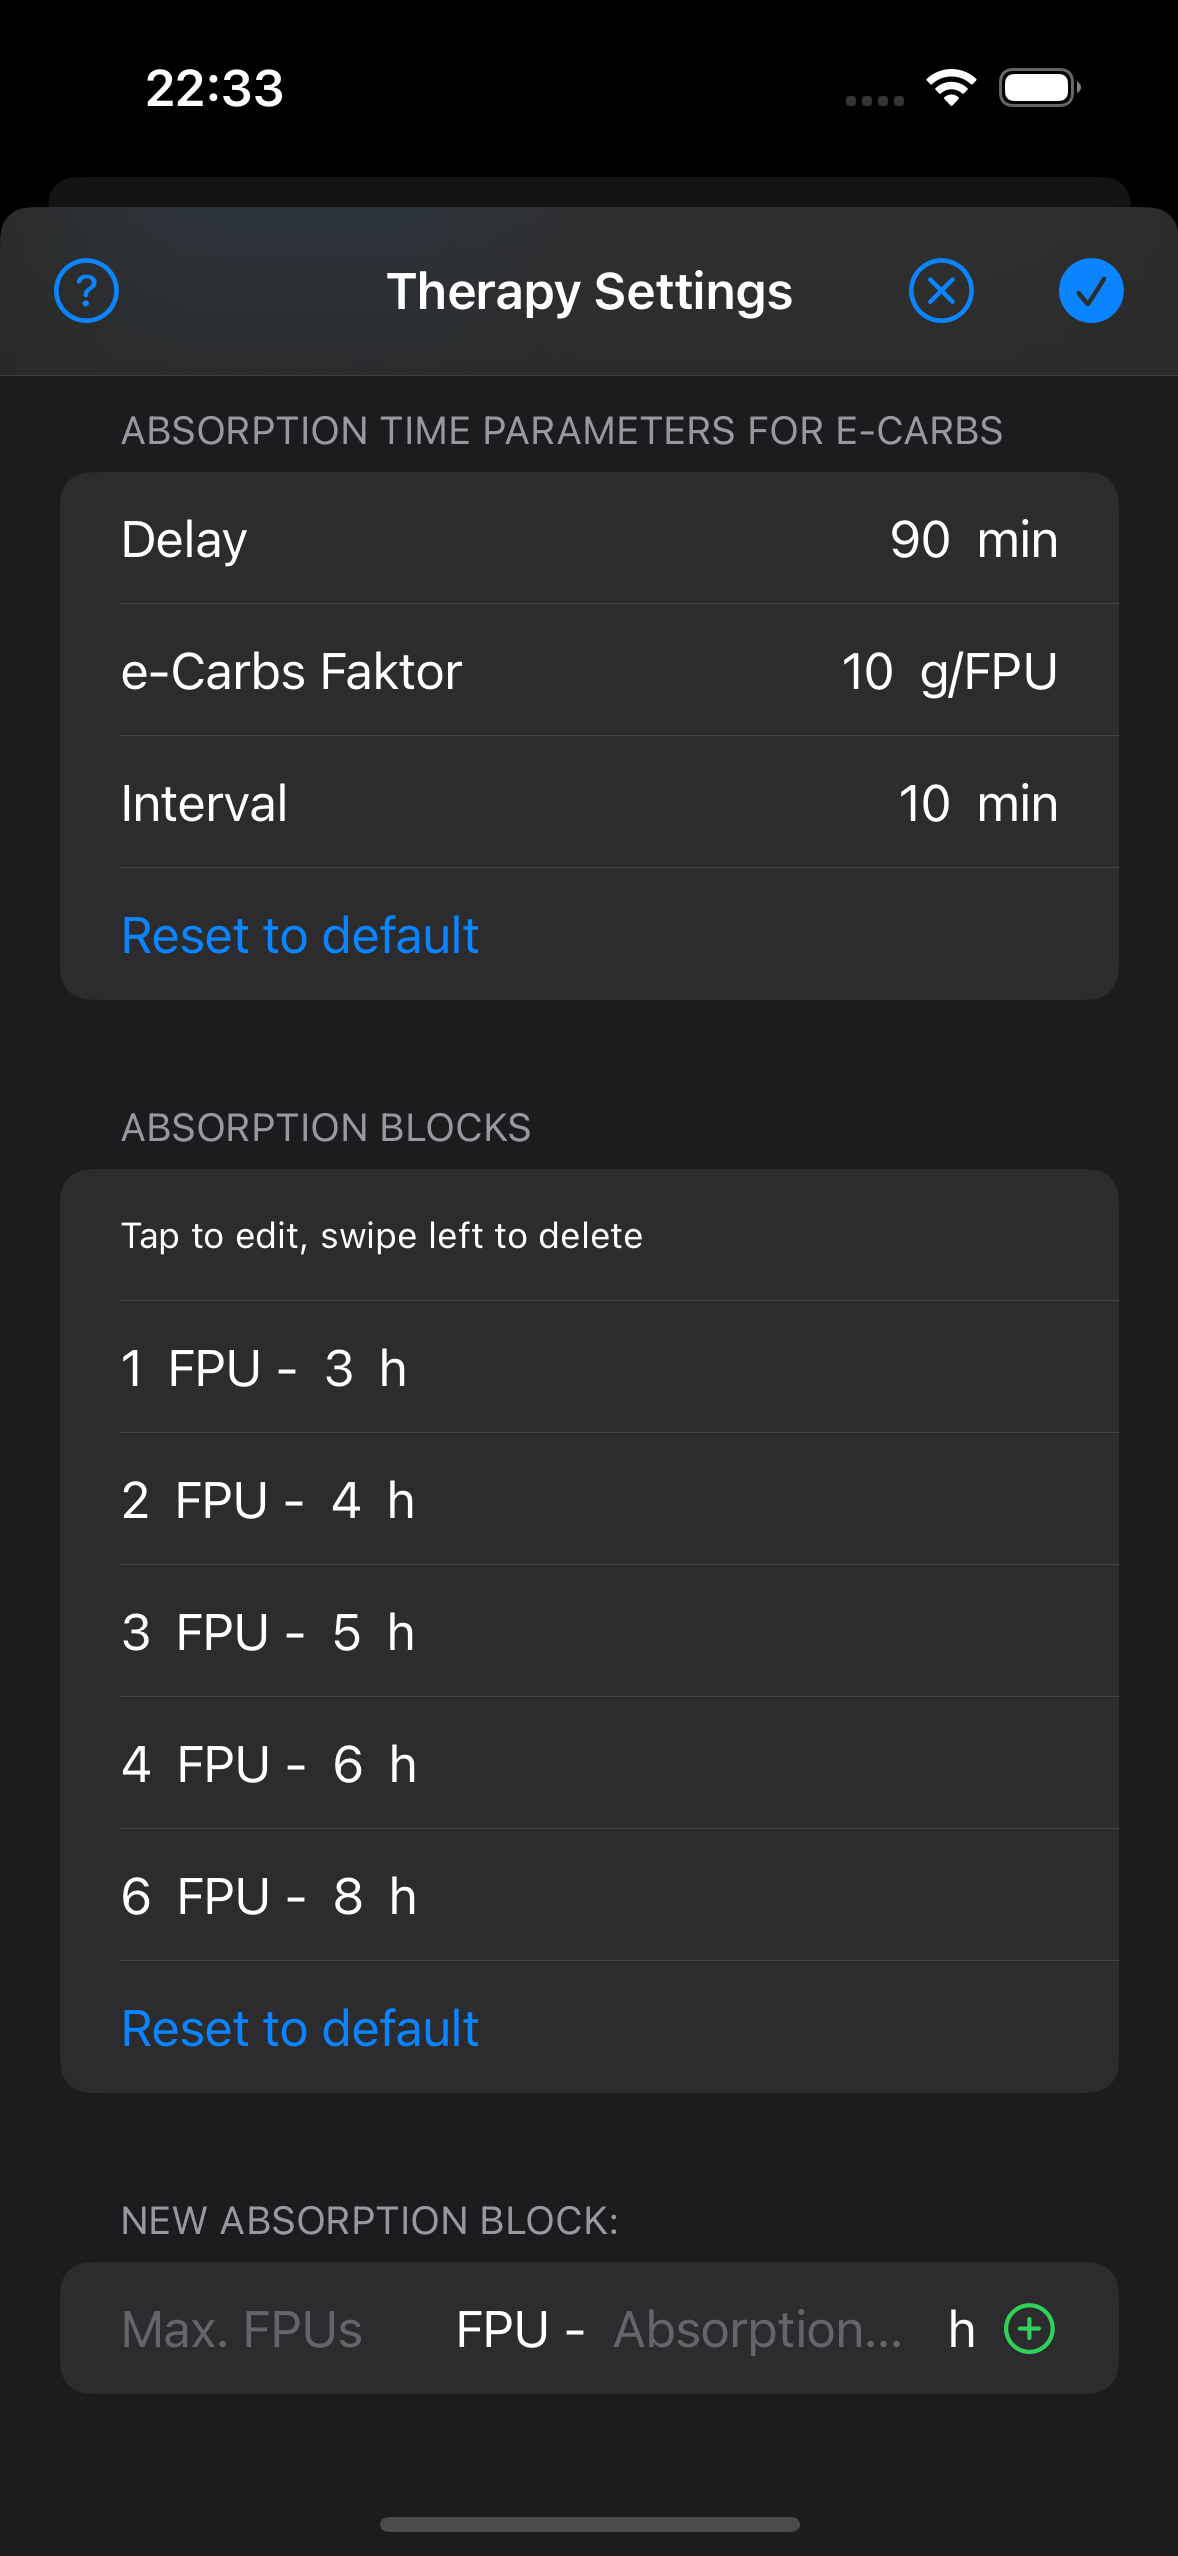
Absorption Scheme for Extended Carbs
Extended carbohydrates are actually not carbohydrates, but fat-protein units (FPUs), though they have a similar effect on blood sugar. Since they come from fats and proteins, which must first be digested by the body, their effect begins later (the default setting is 90 minutes).
The absorption scheme determines the absorption time for a given number of FPUs. The default absorption scheme follows current nutritional science findings and is as follows:
- 1 FPU (= 10g extended carbohydrates): 3 hours absorption time
- 2 FPU (= 20g extended carbohydrates): 4 hours absorption time
- 3 FPU (= 30g extended carbohydrates): 5 hours absorption time
- 4 FPU (= 40g extended carbohydrates): 6 hours absorption time
- 6 FPU (= 60g extended carbohydrates) and more: 8 hours absorption time
This absorption scheme can be edited.
Since each body reacts differently to fat-protein units, it is important to determine your own carbohydrate-per-FPU factor and set it here. The default is 10g carbohydrates per FPU, but for children, I recommend much lower factors.
The app's calculation logic works as follows:
Step 1: Calculate the total calories, e.g., for 72g of Chicken McNuggets (249 kcal per 100g): 72g * 249 kcal / 100g = 179 kcal
Step 2: Calculate the calories from carbohydrates (4 kcal per 1g of carbohydrates), e.g., for 72g of Chicken McNuggets (17g carbohydrates per 100g): 72g * 17g CH / 100g * 4 kcal/g CH = 49 kcal
Step 3: Subtract the calories from carbohydrates from the total calories. The remaining calories come from fats and proteins. In the example: 179 kcal - 49 kcal = 130 kcal
Step 4: Since 100 kcal corresponds to 1 FPU, in the example, 1.3 FPU results, which corresponds to 13.0g of extended carbohydrates when using a carbohydrate-per-FPU factor of 10.
Step 5: The FPUs are rounded, in the example to 1 FPU, and the absorption time is looked up, in this case, 3 hours.
Changes to the absorption scheme are only recommended for those with expertise in nutrition science. All absorption data can be reset to the default settings.
App Settings
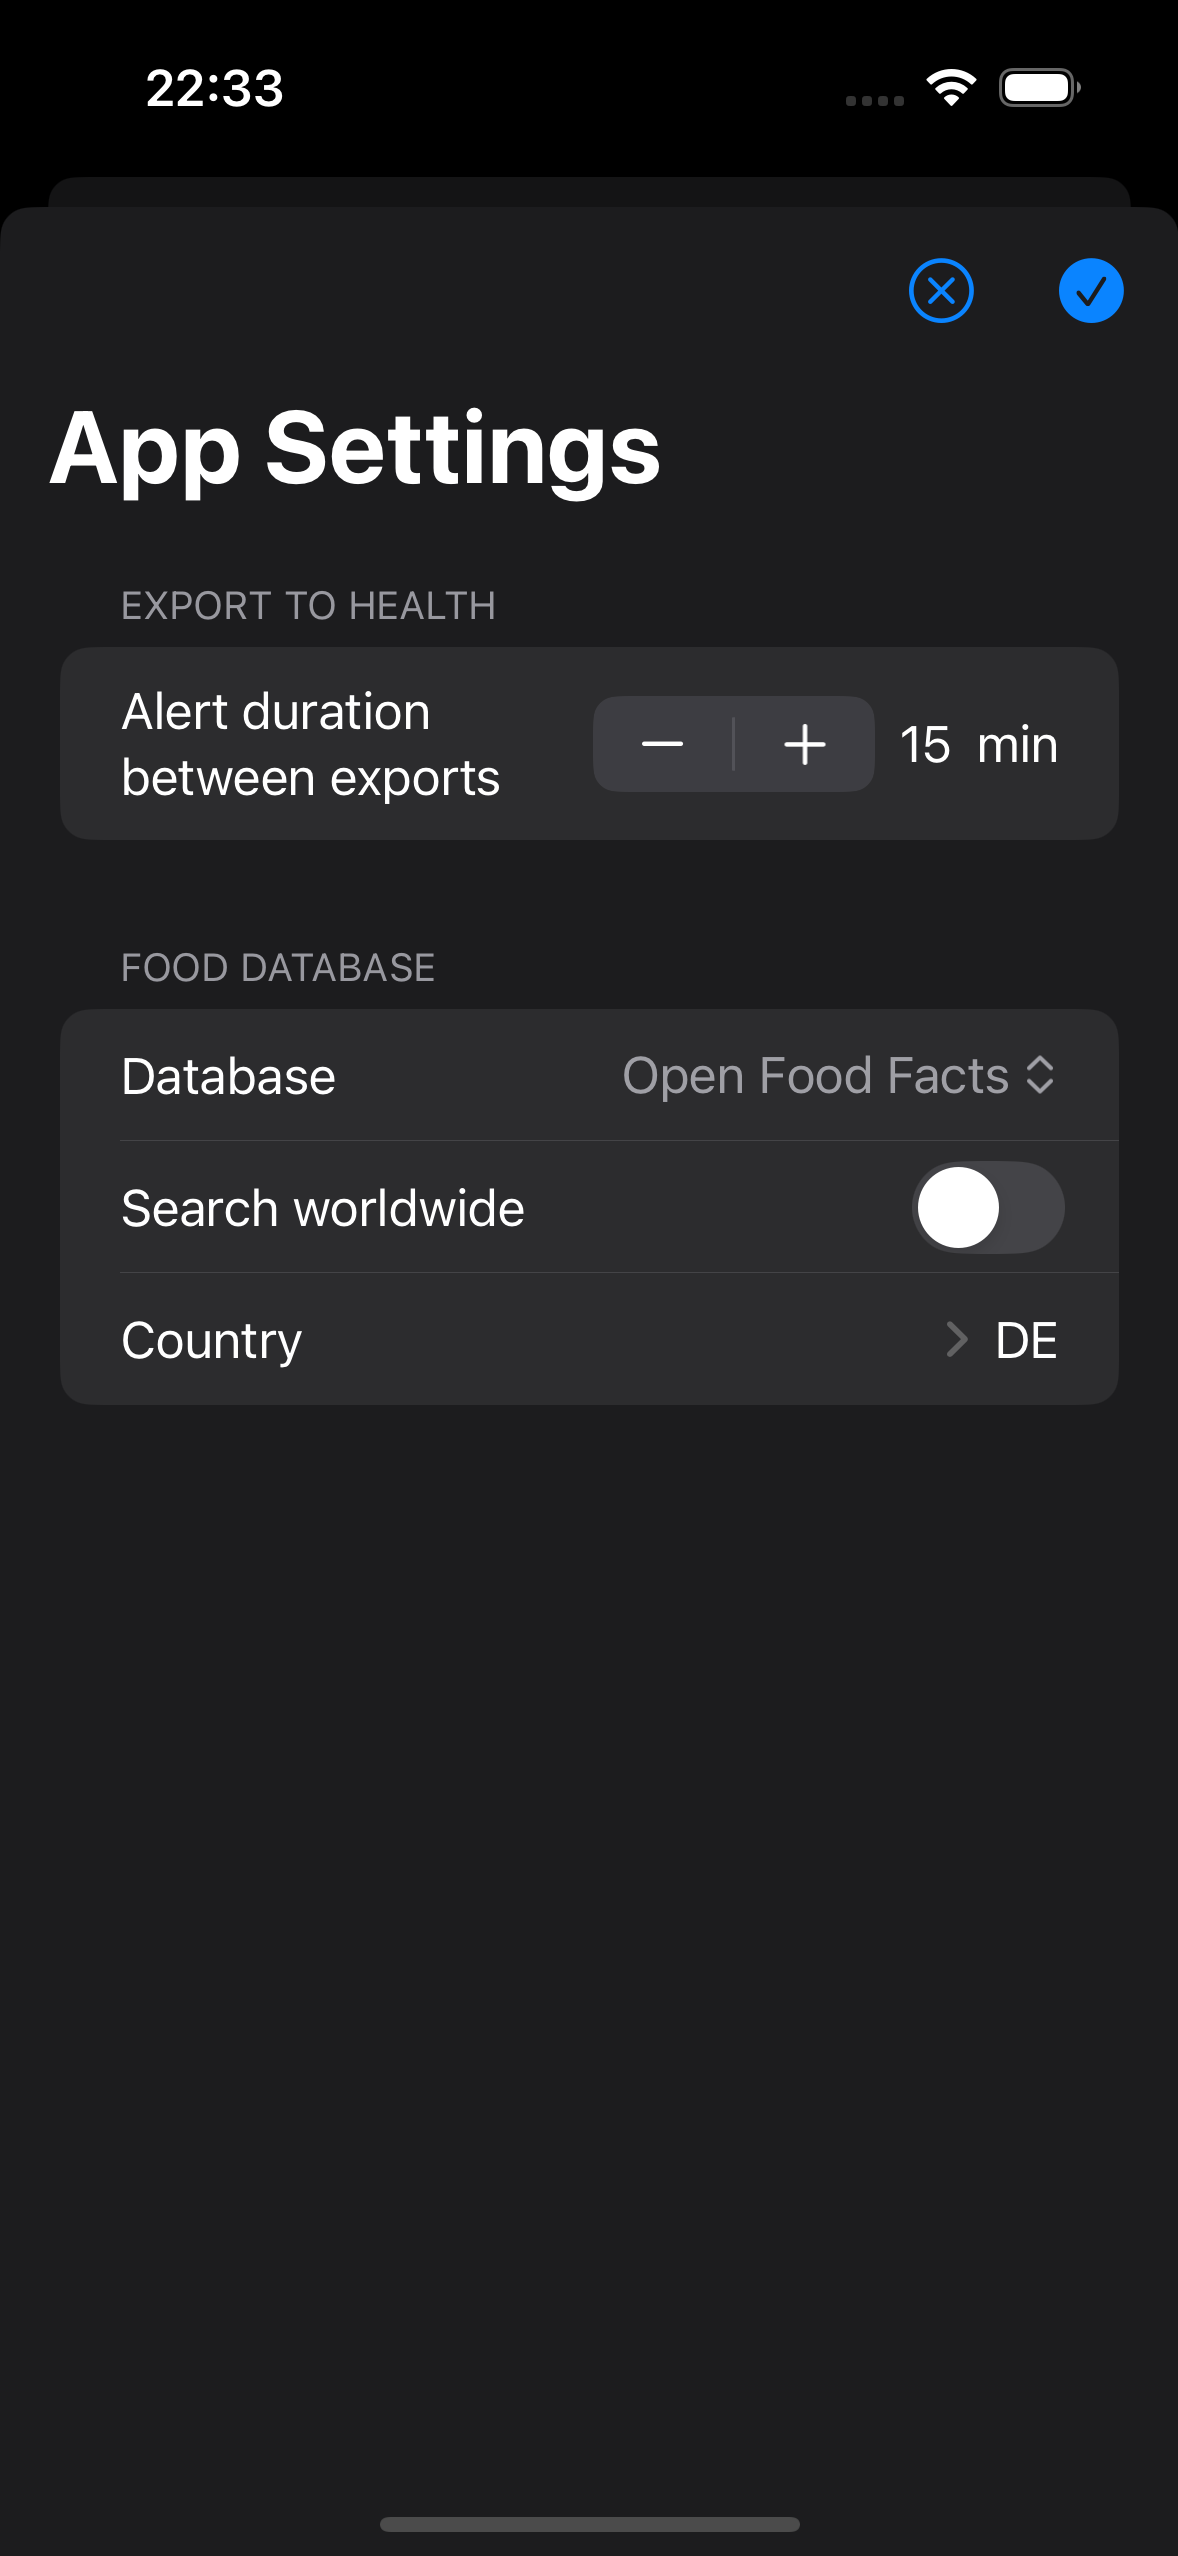
To prevent carbohydrates from meals from being accidentally exported multiple times to Apple Health, potentially increasing the insulin dosage of your Loop system, EasyFPU will notify you if you attempt a re-export within a given time period after the last export. This time period can be set here. The default is 15 minutes.
Additionally, you can select the country in which OpenFoodFacts should search.
Sample Data
This JSON file can be downloaded and used as sample data. Import the file via the "JSON Import" menu option.
However, I strongly recommend creating your own dishes, as typical quantities can vary from person to person.